Table of Contents
Overview
This guide contains information about the Beam® UI (User Interface). The Beam UI is used to configure settings for your Beam or BeamPro system.
Access the Beam UI
To access the Beam UI, connect a USB keyboard using the available USB ports. For Beam Standard and Enhanced, (2) USB ports are located under the head, left of the navigation camera. The BeamPro USB port (1) is located behind the hatch at the back of the head.
Navigating the Beam UI is done using the keyboard ARROW KEYS. Press ENTER to select, ESC to go back, CTRL+SHIFT+N to show network adapter statistics, and CTRL+SHIFT+A for advanced options on screens that offer an advanced mode.
Setup Wizard
The first time using the Beam UI (or following a factory restore), the Setup Wizard will prompt. During setup, you'll be asked to select a language and connect your Beam to a WiFi network. 
For more information regarding the network configuration process, please see our dedicated Help Center articles: Configuring Beam WiFi - Basic Network, Enterprise Network, Hidden SSID.
All set! The Beam will now launch the Device Settings menu where additional changes can be made.
Device Settings Menu
The Device Settings menu is the gateway to the Beam interface. Information regarding the content of each section is as follows:
- WiFi Setup: Configure Beam WiFi network(s)
- Options: Adjust network settings, sound, and system language
- Tools: Run diagnostics, restore factory defaults
- About: Find Beam name, serial ID, and software version

WiFi Setup
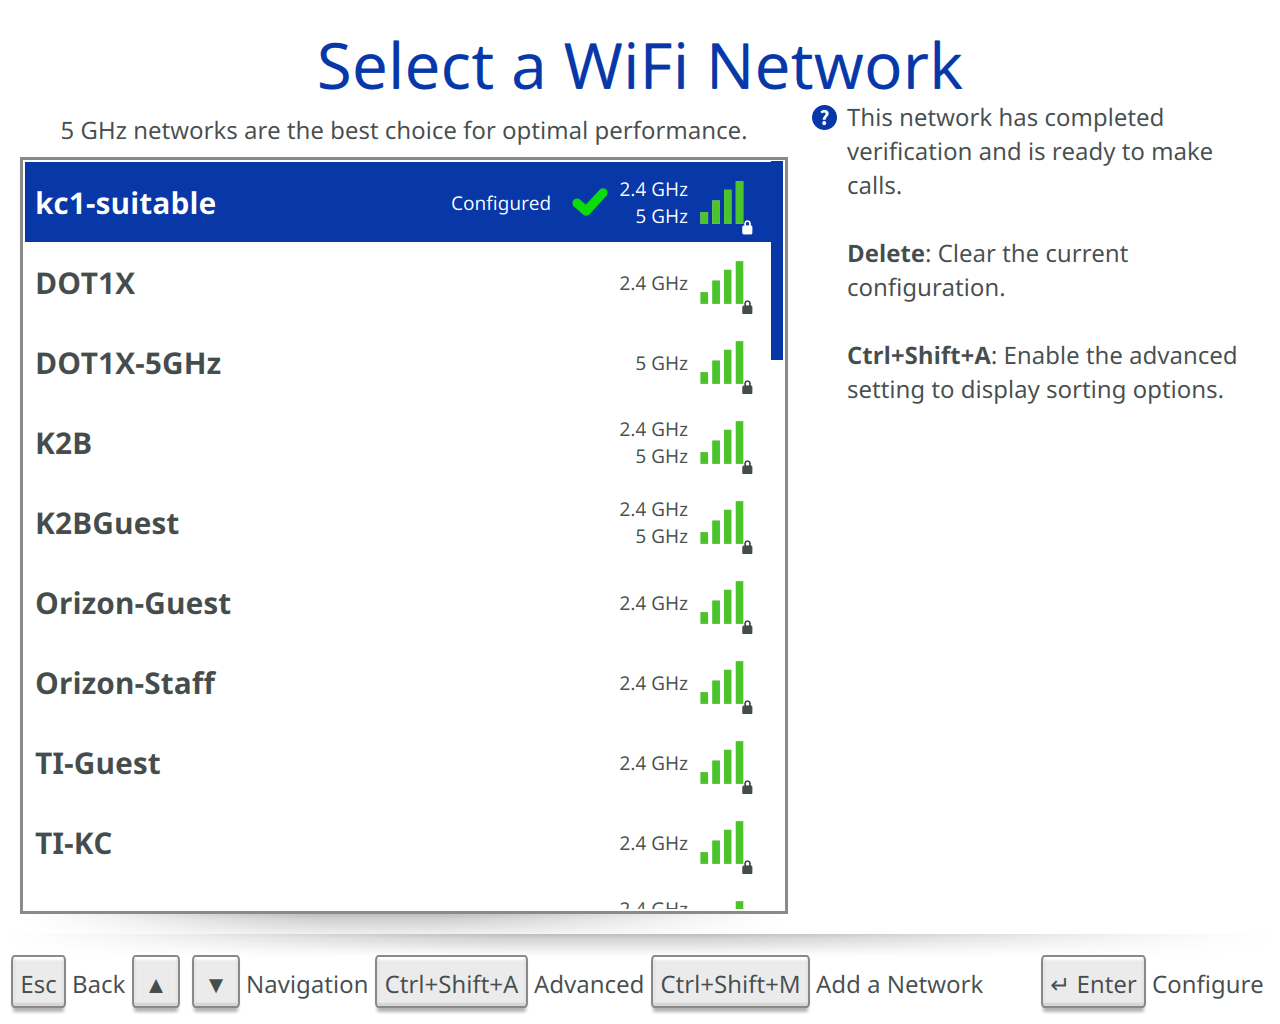
The WiFi Setup screen will help get your Beam connected to a WiFi network.
Initially this screen will show a list of available networks within range of the Beam. There is an option to limit available networks to a specific frequency band including “Both 2.4 GHz and 5GHz”, “2.4 GHz only”, “5 GHz only”, or to manually configure a network. Note: Suitable Technologies ALWAYS recommends using a 5GHz network when available.
-
When prompted with a “Select a WiFi Network” screen, select the network you’d like to configure.

-
Depending on the type of WiFi network, different options may be displayed. See below for all available options
-
Open
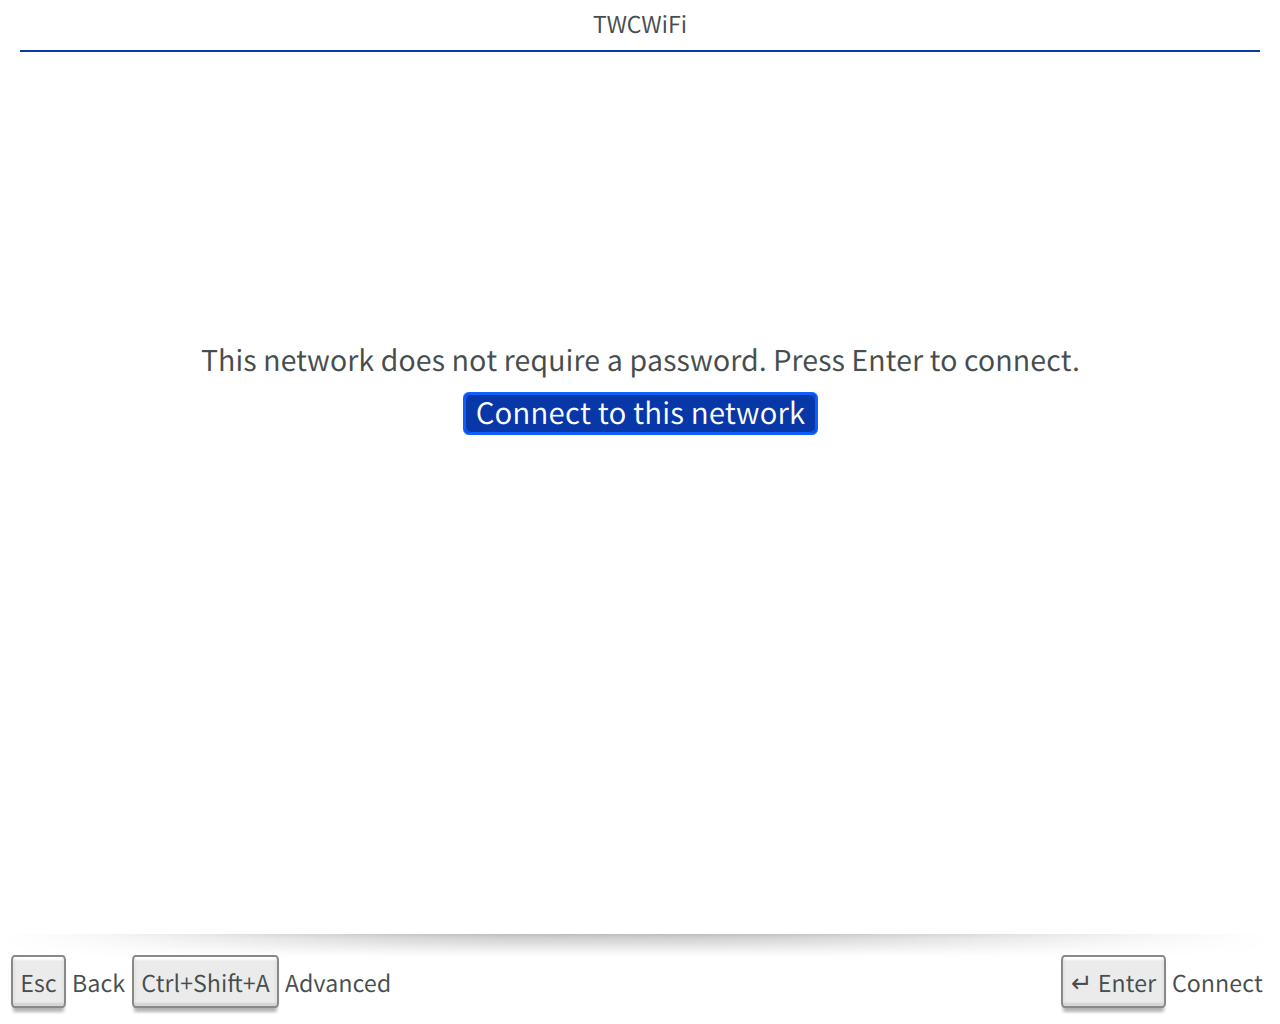
- SSID field: Name of WiFi Network you’d like to connect to.
- Enabled check box: Enable the Beam to use this network.
-
WEP 40/128-bit
- SSID field: Name of WiFi Network you’d like to connect to.
- Enabled check box: Enable the Beam to use this network.
- Password: Password / key for WEP network.
-
WPA or WPA2 Personal
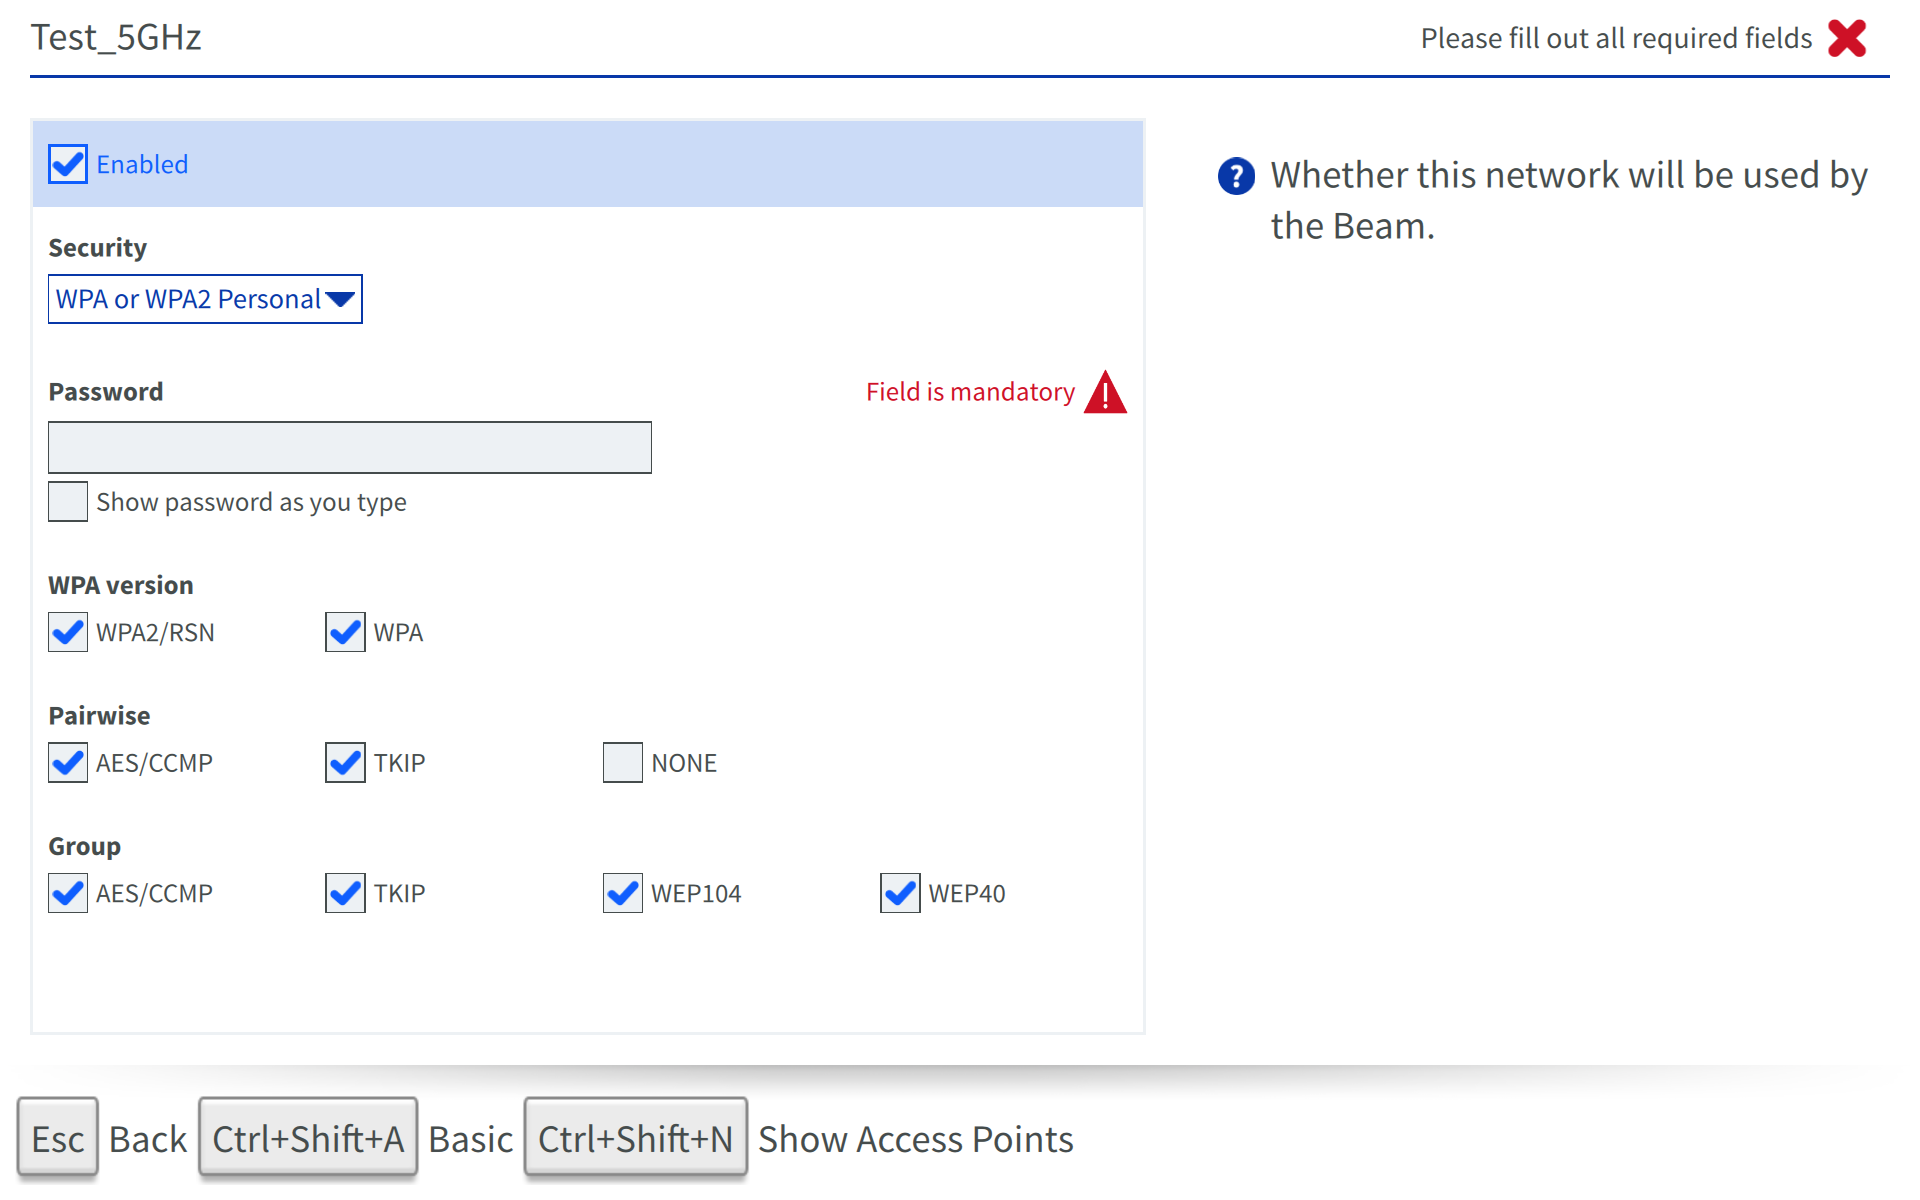
- SSID field: Name of WiFi Network you’d like to connect to.
- Enabled check box: Enable the Beam to use this network.
- Password: Password WPA network.
- Advanced Mode: Hit CTRL-SHIFT-A to reveal the options below.
- WPA Version: Select those version that apply to your network from WPA and WPA2/RSN.
- Pairwise: Select the items that apply for your configuration from TKIP, AES/CCMP and NONE.
- Group: Select the items that apply for your configuration from TKIP, AES/CCMP, WEP40 and WEP104.
-
WPA or WPA2 Enterprise
If you need to import WiFi certificates from a USB flash drive, see the instructions to Configure Beam with a USB Flash Drive and the WPA/WPA2 Enterprise - 802.1X/EAP Configuration Beam Help Center article for help.
Please ensure that any certificates used are .PEM Base64 encoded with “—–Begin Certificate——” prefix and “—–END Certificate—–” suffix. Any certificates used/needed can be chained into a single .PEM file using OpenSSL if necessary.
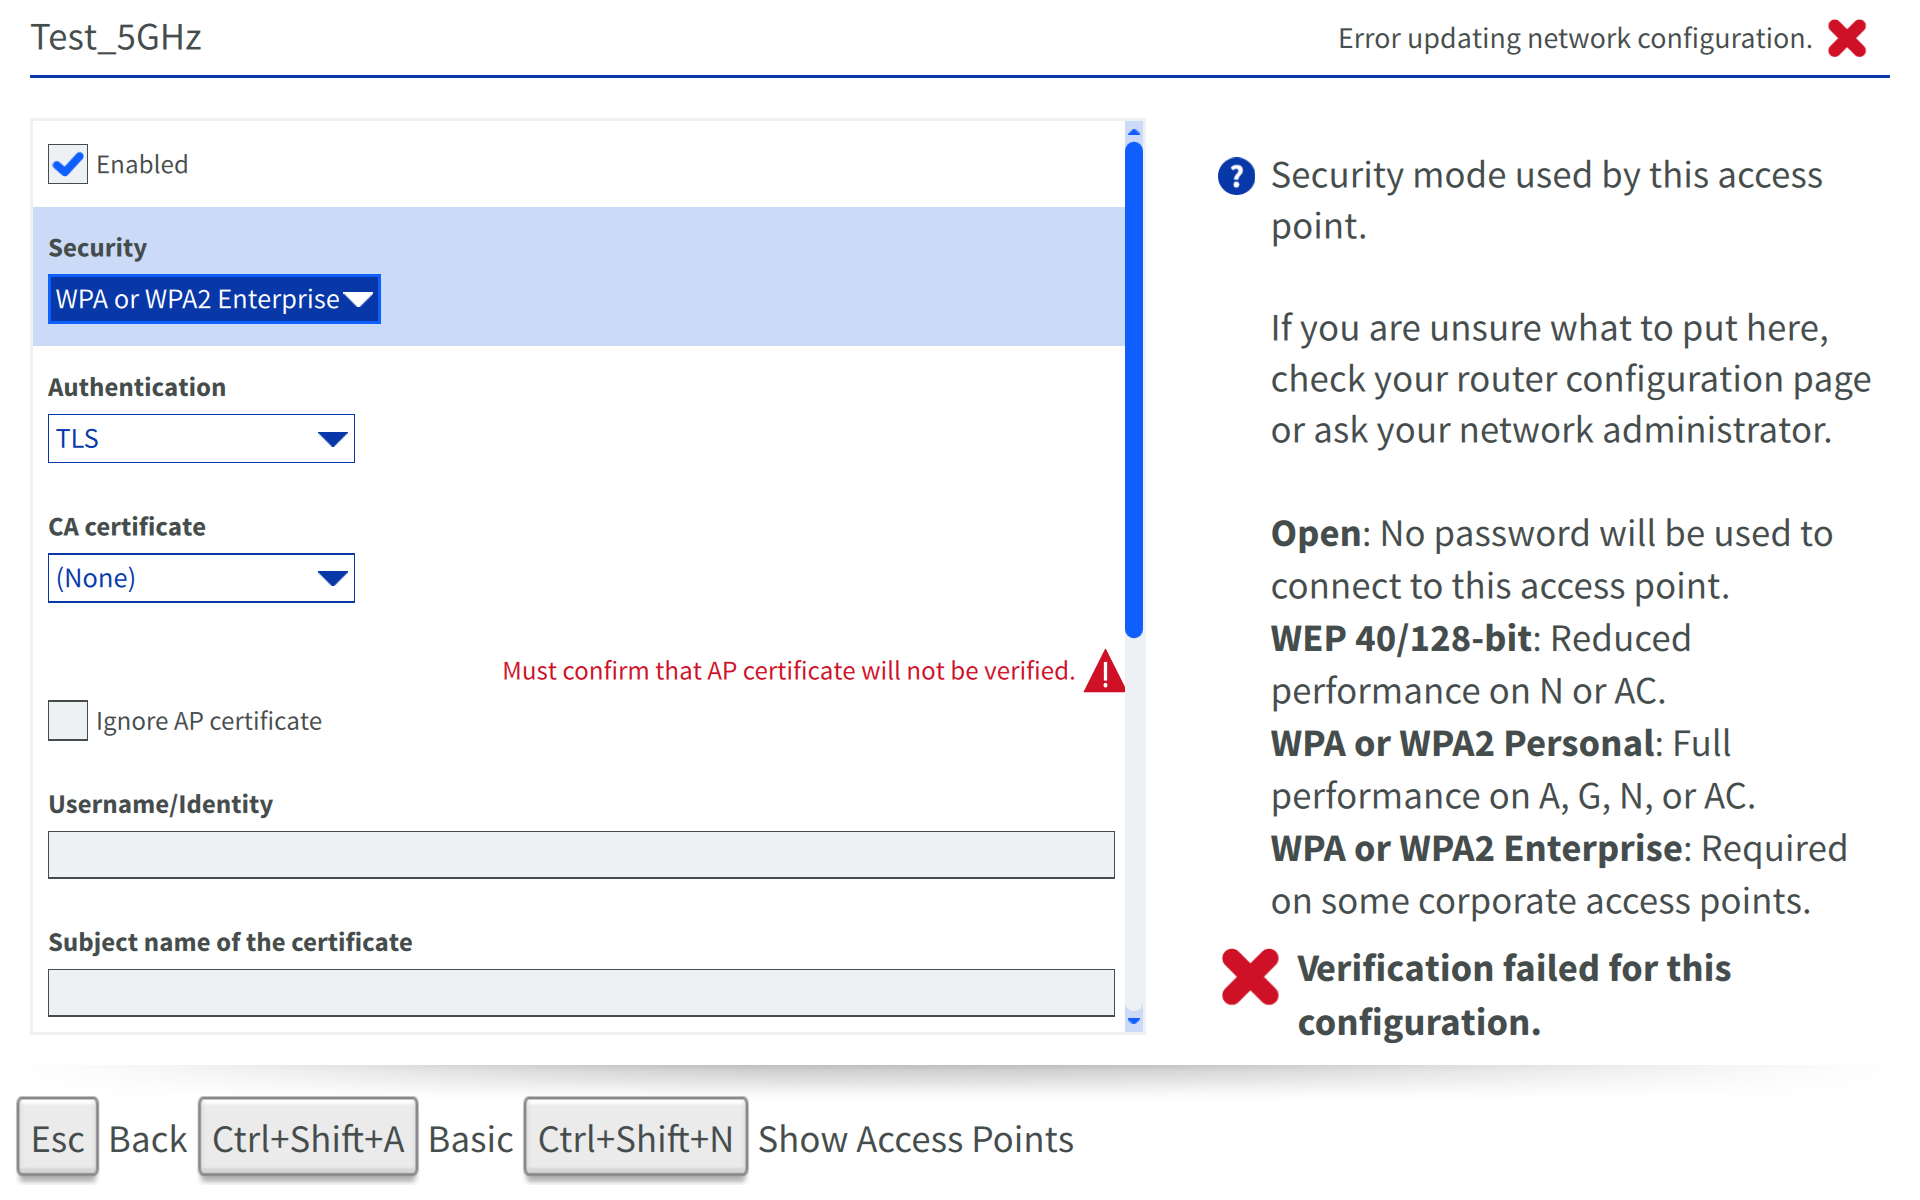

- SSID field: Name of WiFi Network you’d like to connect to.
- Enabled check box: Enable the Beam to use this network.
- Authentication: Authentication protocol in use from TLS, Tunneled TLS or Protected EAP (PEAP).
- CA certificate: CA certificate which has been imported on Beam.
- Subject name of the certificate: Server certificate subject to match.
- Client certificate: Client certificate which has been imported on Beam.
- Private Key: Private key which has been imported on Beam.
- Private Key Password: Password for private key.
- Username/Identity: User name associated to certificate(s).
- WPA Version: Select those version that apply to your network from WPA and WPA2/RSN.
- Advanced Mode: Hit CTRL-SHIFT-A to reveal the options below.
- Pairwise: Select the items that apply for your configuration from TKIP, AES/CCMP and NONE.
- Group: Select the items that apply for your configuration from TKIP, AES/CCMP, WEP40 and WEP104.
-
Captive Portal Network
A Captive portal network is a network which prompts you to agree to terms or to enter a user name and password on a web-page prior to connection.
When connecting to a WiFi network with a captive portal page, you will need to tether a helper device (phone, tablet or laptop) to the Beam to browse and clear the captive portal.
On BeamPro and Beam Enhanced, this must be done via WiFi. For instructions, see the Beam Help Center article titled “How do I clear a captive portal page on my BeamPro or Beam Enhanced?”
On Beam, this must be done via Bluetooth. For instructions, see the Beam Help Center article titled “How do I clear a captive portal page on my Beam via Bluetooth?”
-
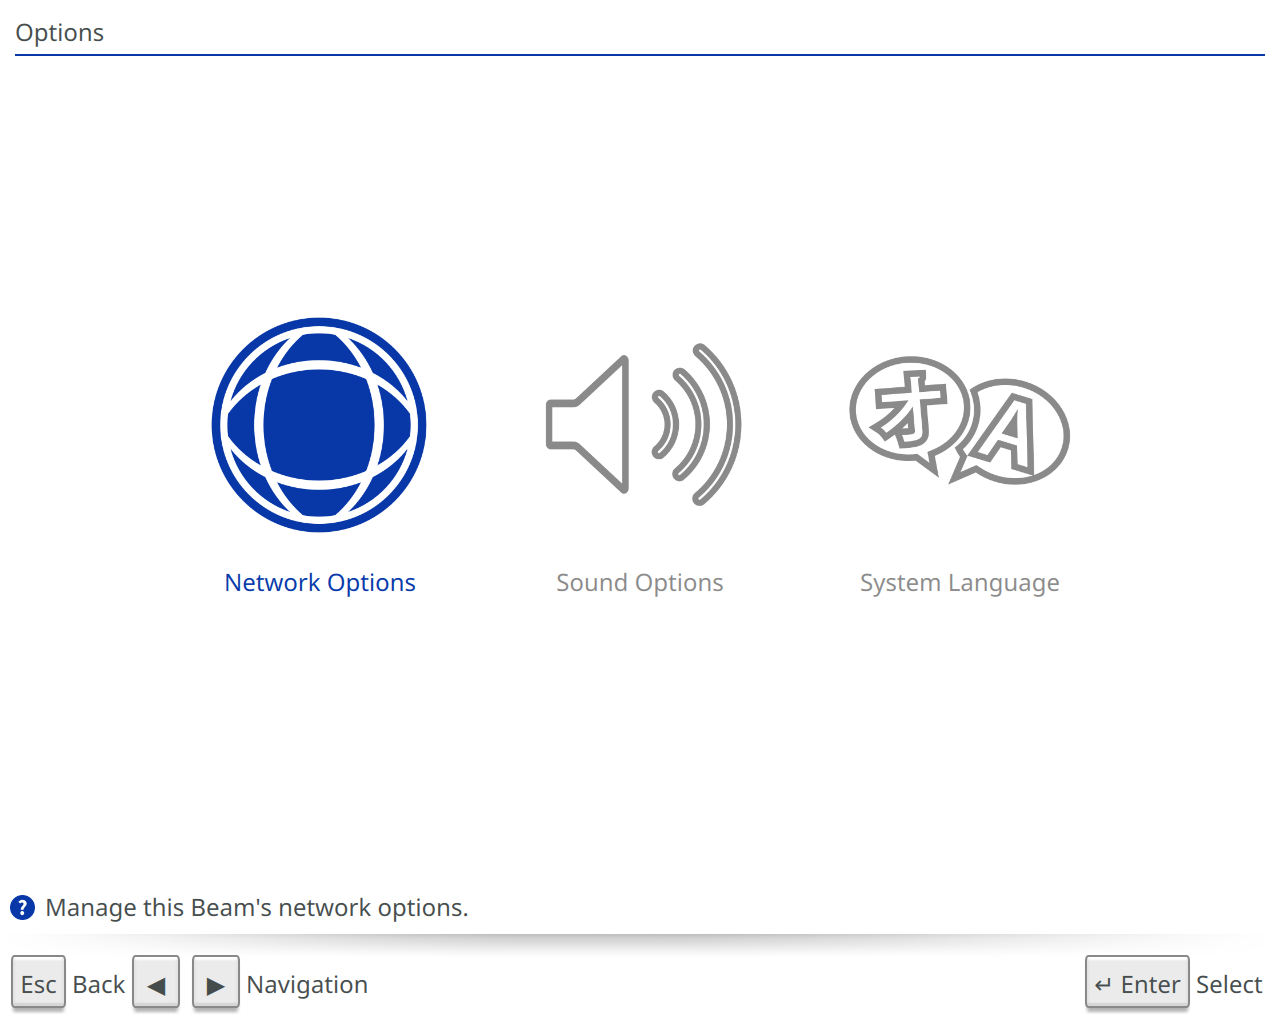
Options
The options screen will help you manage the network and system settings of your Beam.
-
Network Options
Manage all the Beam’s network settings from here. Represented in advanced mode below.
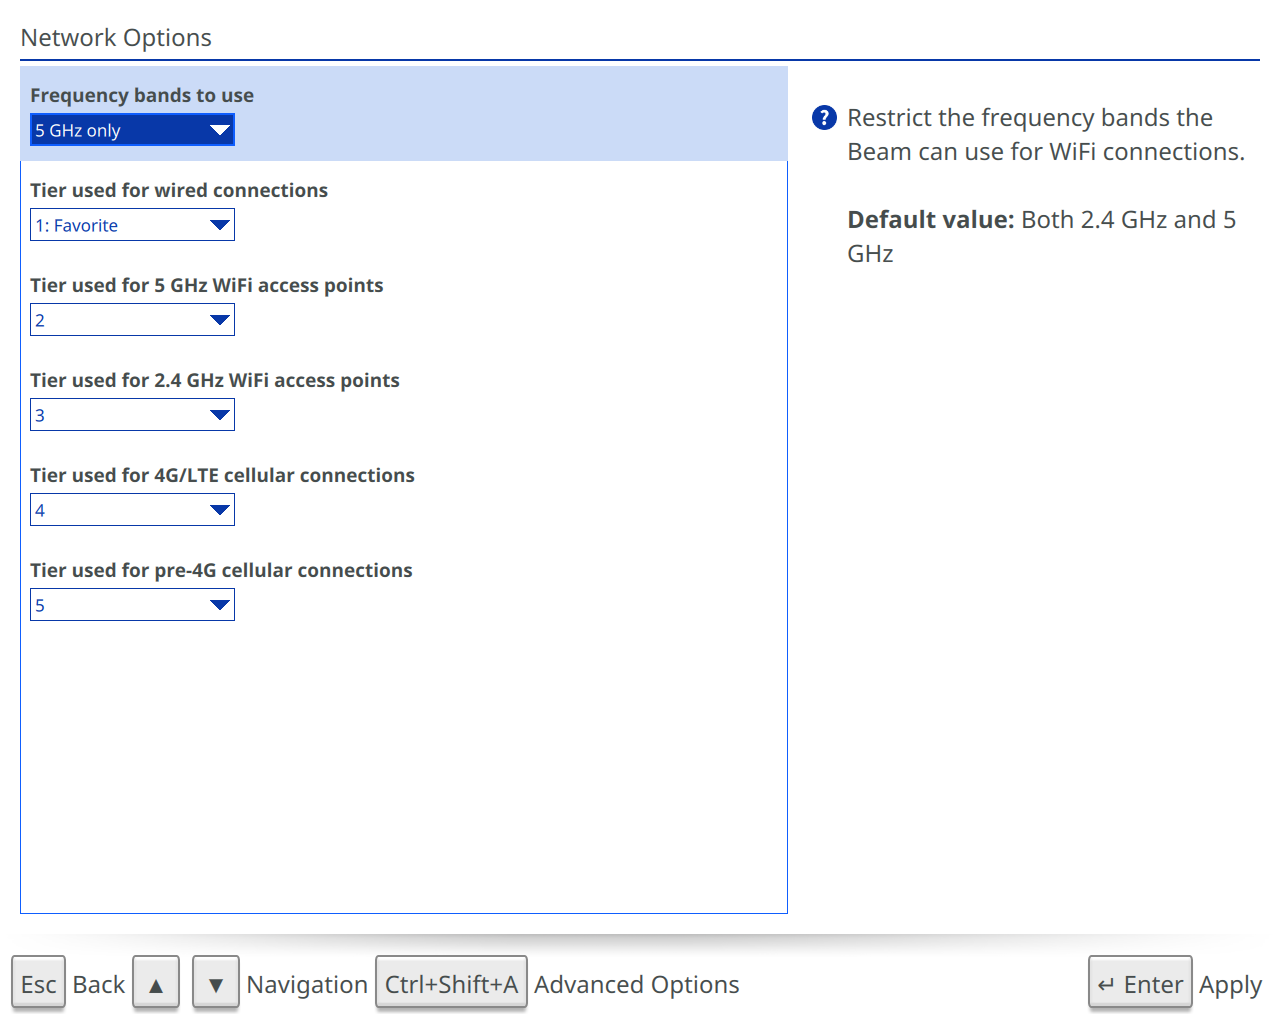
- Frequency bands to use: The option to limit the networks available to this Beam to a specific frequency band. Options are Both 2.4 GHz and 5GHz, 2.4 GHz only or 5 GHz only.
- Tier used for XXXX connections: Tiering used to influence how the Beam decides which interface to use. The Beam will try to use interfaces with lower-number tiers before interfaces with higher-number tiers.
- Scan type: Type of Scan used to discover access point. Available options are Active broadcast, Active directed or Passive. Active Broadcast requests any access point to respond. Active Directed is necessary for hidden SSIDs to work and would request specific access points to respond. Passive listens for periodic broadcasts from access points.
- Maximum TX power: Measured in dBm, this will set the maximum transmitting power when Beam is in connection sharing mode.
- Weak WiFi connection RSSI threshold: RSSI stands for Received Signal Strength Indication. This threshold will dictate when a WiFi connection is too weak and will cause lower tier connections to become preferred.
- Timeout for verifying an access point or network: Measured in seconds, this threshold will dicate the amount of time the Beam will attempt to verify network connectivity.
- Timeout for opening captive portal URL: Measured in seconds, this threshold will dictate how long the Beam tests for a captive portal WiFi connection. Networks which require you to agree to certain terms or enter login credentials on a webpage before you can access the internet through that network are known as captive portal networks.
- DHCP timeout: Measured in seconds, this threshold dictates how long the Beam will wait for a DHCP response before aborting its first connection attempt to a network. Subsequent connection attempts to the same network will double the timeout time used for that network each time.
- DHCP exponential backoff minimum: Measured in seconds, this threshold will dictate how long the DHCP client will wait when starting a connection attempt before retrying its request for the first time. Subsequent retries during a connection attempt will double the retry period.
- DHCP exponential backoff maximum: Measured in seconds, this threshold will dictate the maximum duration between any two DHCP retries during any connection attempt. Once the retry period for a connection attempt has reached this value, the retry period will remain the same for the remainder of that connection period.
- Hysteresis for changing AP on secondary interface when stationary: The Beam will only switch to a new access point when stationary if the desirability of the new access point is at least this many points greater.
- Hysteresis for changing AP on secondary interface when moving: The Beam will only switch to a new access point when moving if the desirability of the new access point is at least this many points greater.
- Scan width (2.4 GHz): Scan will detect access points within this many MHz of the scan frequency.
- Max BSS count: Maximum number of BSS entries the Beam will cache.
- Maximum allowed latency to relay: Measured in seconds, keep-alive packets that have a higher latency than this threshold are considered lost so the goodness of the network will be affected as well as necessitating a network interface restart.
- Ping rate for an idling interface: Measured in Hz, this is the ping rate used for an interface that is not being used for call data.
- Ping rate on a possibly dead interface: Measured in Hz, this is the ping rate used for an interface that is believed to be inoperable.
- Strong connection loss threshold during call: Measured as percentage, this threshold will dictate the loss below which a connection is considered to be strong when in a call or a keyboard is connected.
- Strong connection loss threshold when not in call: Measured as percentage, this threshold will dictate the loss below which a connection is considered to be strong when in a call or a keyboard is connected.
- Association timeout: Measured in seconds, this threshold dictates how long the Beam will attempt to connect to an access point.
- Fast re-authentication for WPA Enterprise: This option dictates whether the Beam will attempt to use the WPA enterprise fast re-authentication feature. When enabled, the Beam will attempt to reuse authentication when roaming. When disabled, the Beam will always go through the entire authentication process.
- Warn on AP country code consistency: This option dictates whether the Beam will warn when it detects an access point using frequencies incompatible with its noted enabled or unlikely country codes.
- Single Adapter WiFi Roaming: This option dictates whether the Beam will roam, or switch access points during a call when the device is only equipped with one WiFi interface. When set to auto, the Beam will intelligently decide whether to roam or not. When on, the Beam will roam and when off, the Beam will avoid roaming during a call.
- Single Adapter WiFi Roaming Band Preference: This option dictates the whether the Beam will roam when it is on a lower-tier WiFi band. When set to auto, the Beam will intelligently decide whether to roam to improve WiFi band tier or not. When on, the Beam will roam to improve WiFi band tier and when off, the Beam will avoid roaming to improve WiFi band tier.
- Single Adapter Roaming Threshold: Measured in dBm, this threshold will dictate whether the Beam will try to connect to a new access point when in single adapter mode if its current access point falls below the noted
- Custom configuration servers: If your network prevents the Beam from reaching the default configuration server, you may provide the custom configuration server here by noting the IP “address:port.” This field is most commonly used by locations that employ an Internal Beam Relay. For myltiple entries, you can separate with a “space.”
-
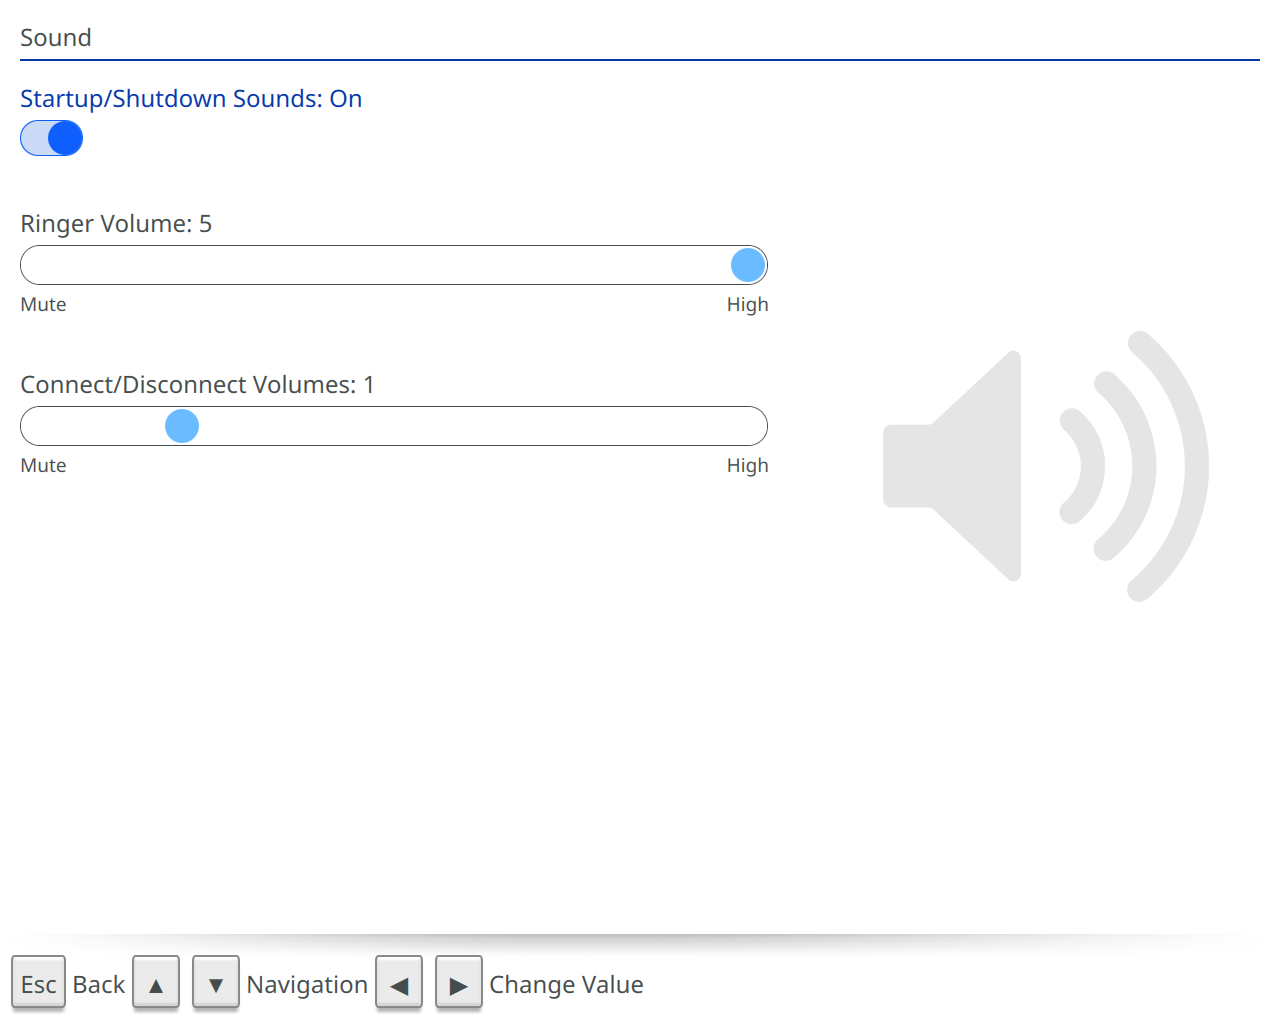
Sound Options Manage the Beam’s sound options.
Manage all the Beam’s sound settings from here
-
System Language
Set the language for the Beam here.

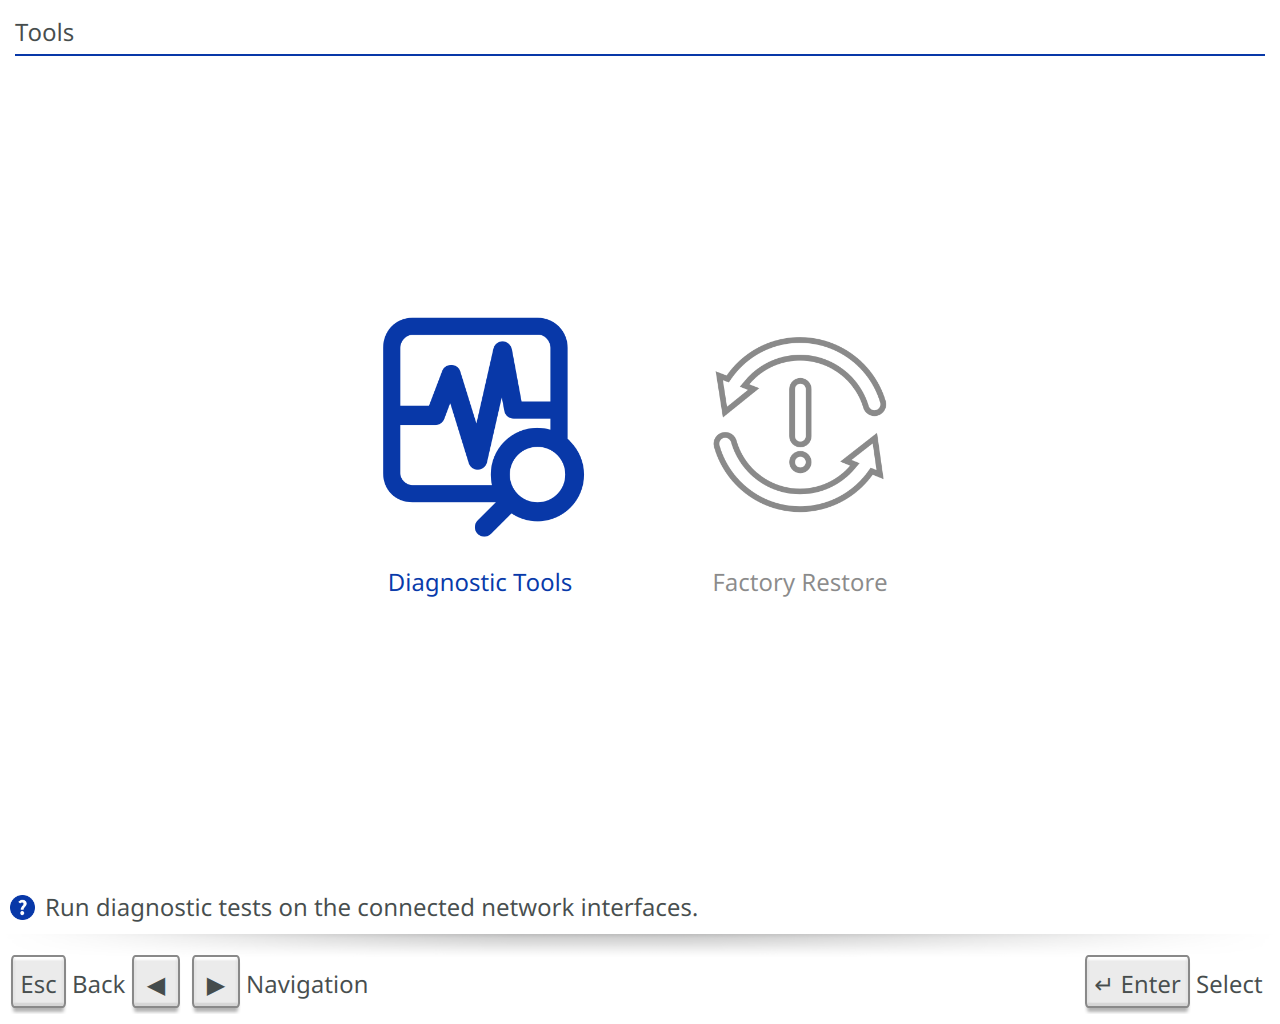
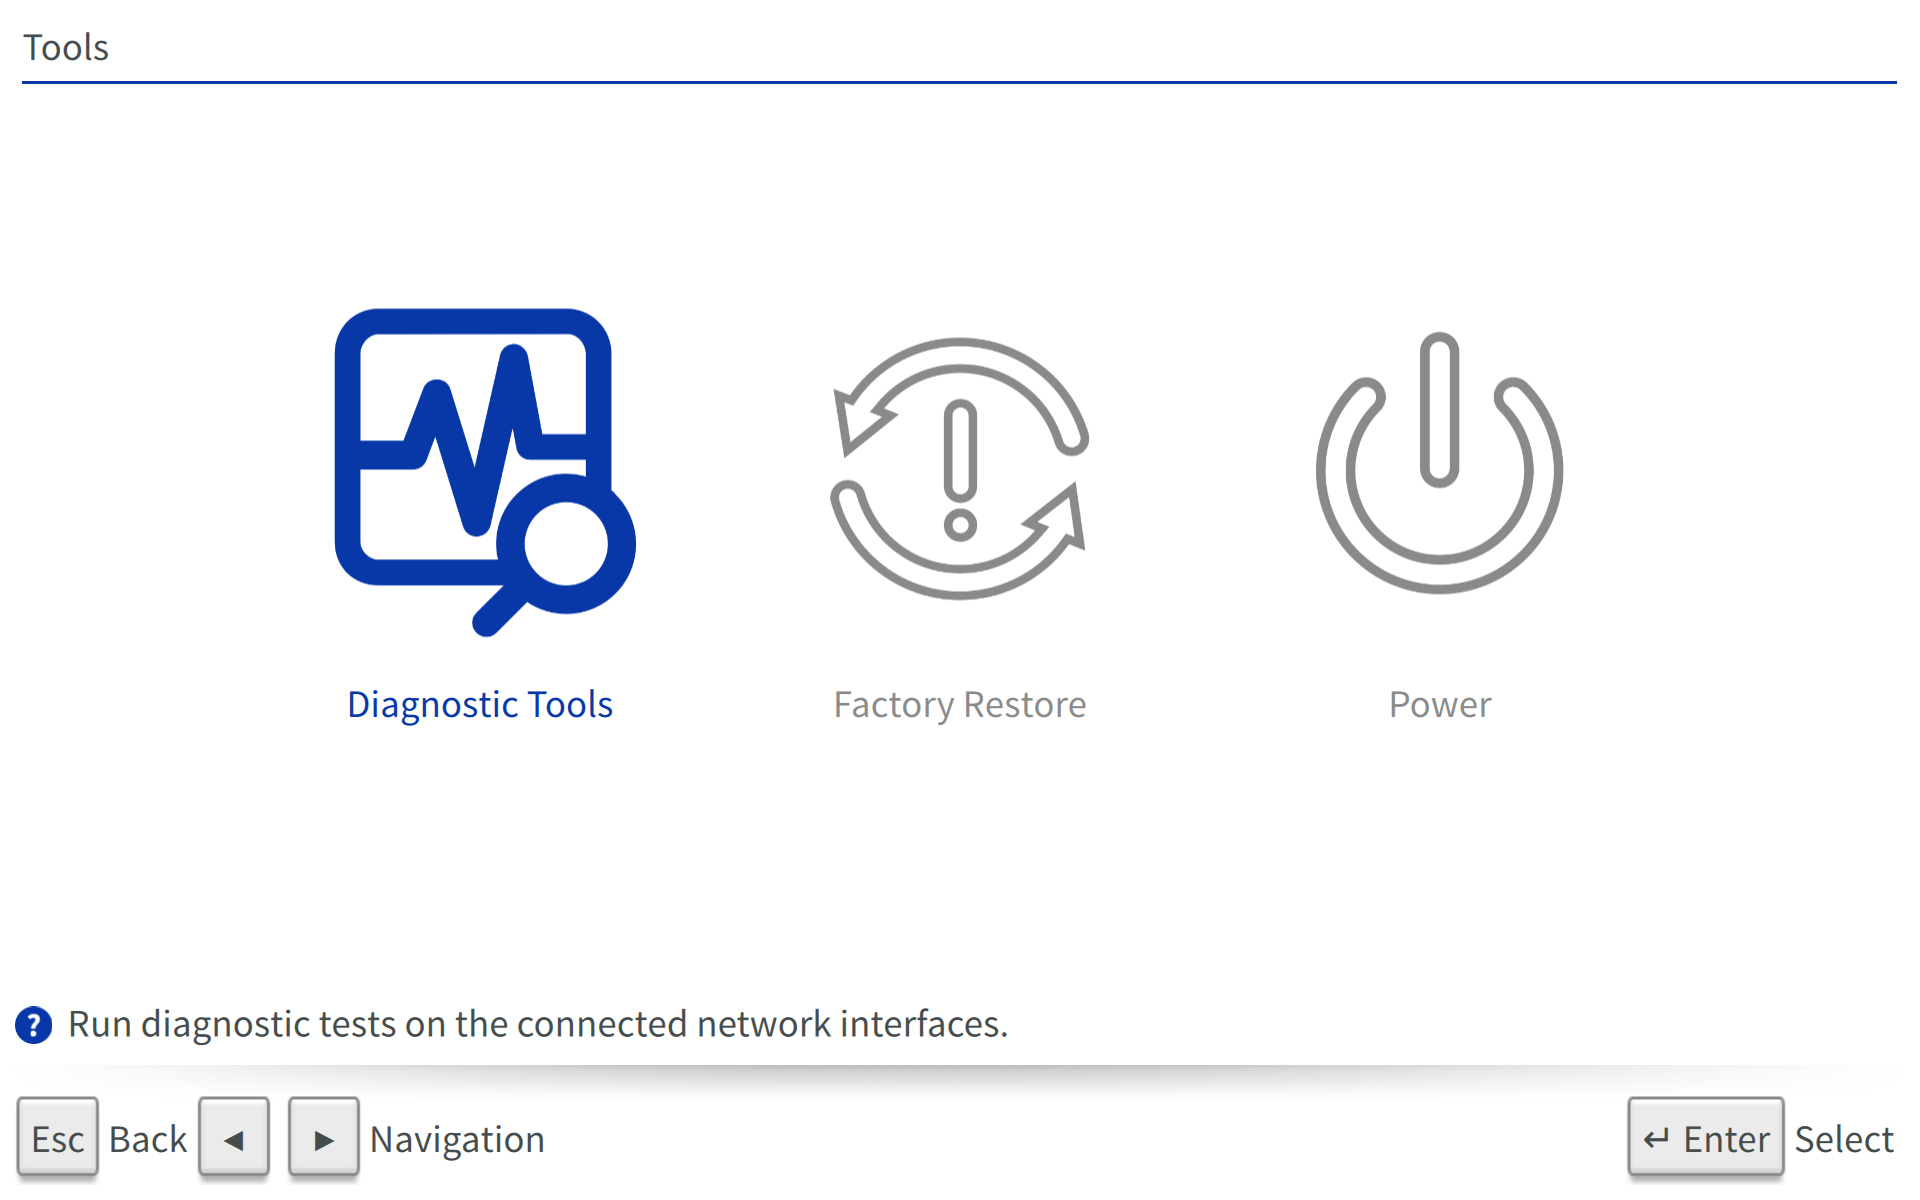
Tools
The Tools section will provide you with helpful tools you can use on Beam. Note: Beam™ and Beam™ Enhanced will give power options in this menu as the physical power button puts the device to sleep. BeamPro™ will not give these options as the power button powers the device on and off. See differences below.
-
Diagnostic Tools
Tools used to diagnose connection problems on the Beam SPD.
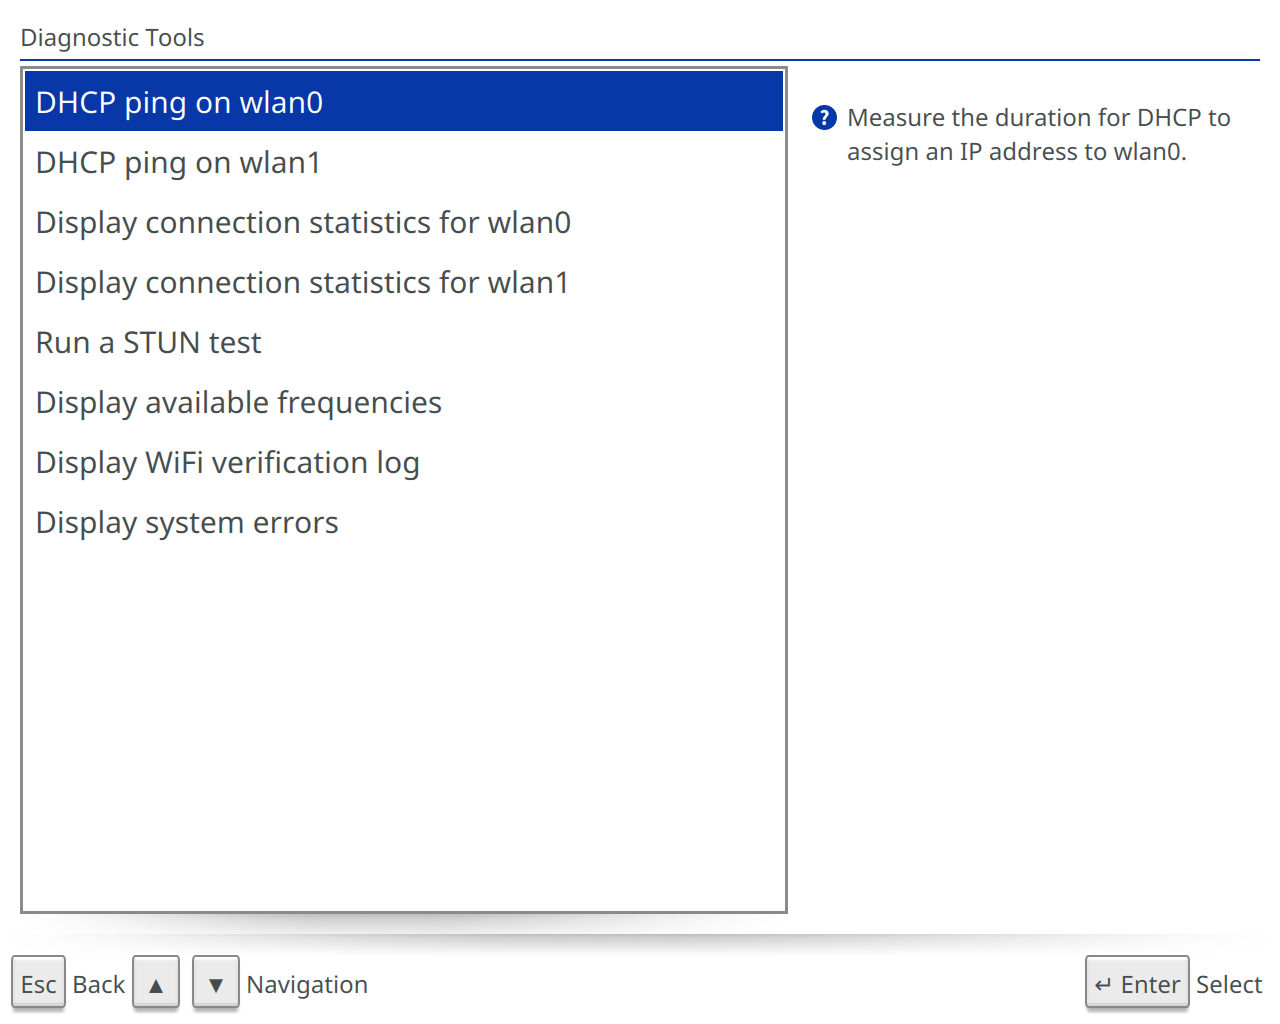
- DHCP Ping on wlan0: Measures the duration for DHCP to assign an IP address to wlan0.
- DHCP Ping on wlan1: Measures the duration for DHCP to assign an IP address to wlan1.
- Display connection statistics for wlan0: Show statistics such as network bandwidth and signal strength for wlan0.
- Display connection statistics for wlan1: Shows statistics such as network bandwidth and signal strength for wlan1.
- Run a STUN test: Tests the use if the STUN protocol on the network. This is necessary to make and receive Beam calls. If STUN is working well, all relays should return the same IP address and port number.
- Display available frequencies: Shows the WiFi frequencies and channels which are usable on this device.
- Monitor low-level WiFi stats: Shows detailed WiFi performance metrics.
- Display WiFi verification log: View the log of verification responses for all configured WiFi networks.
- Display system errors: Displays system errors which may prevent the Beam from functioning properly.
-
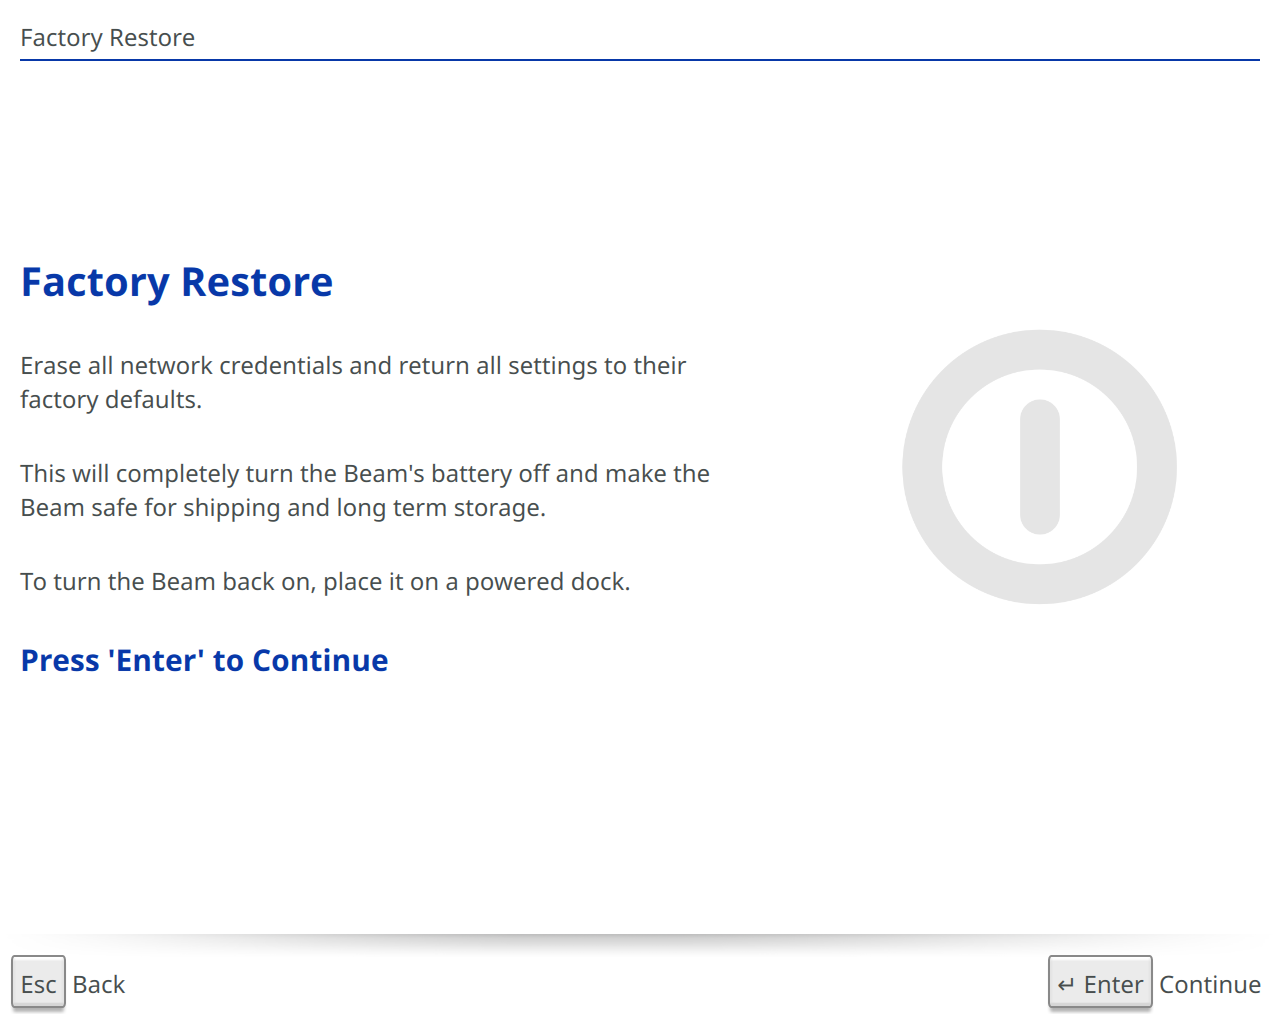
Factory Restore
Erase all network credentials and restore settings to default values.
-
Power
Shut down and restart options for Beam.
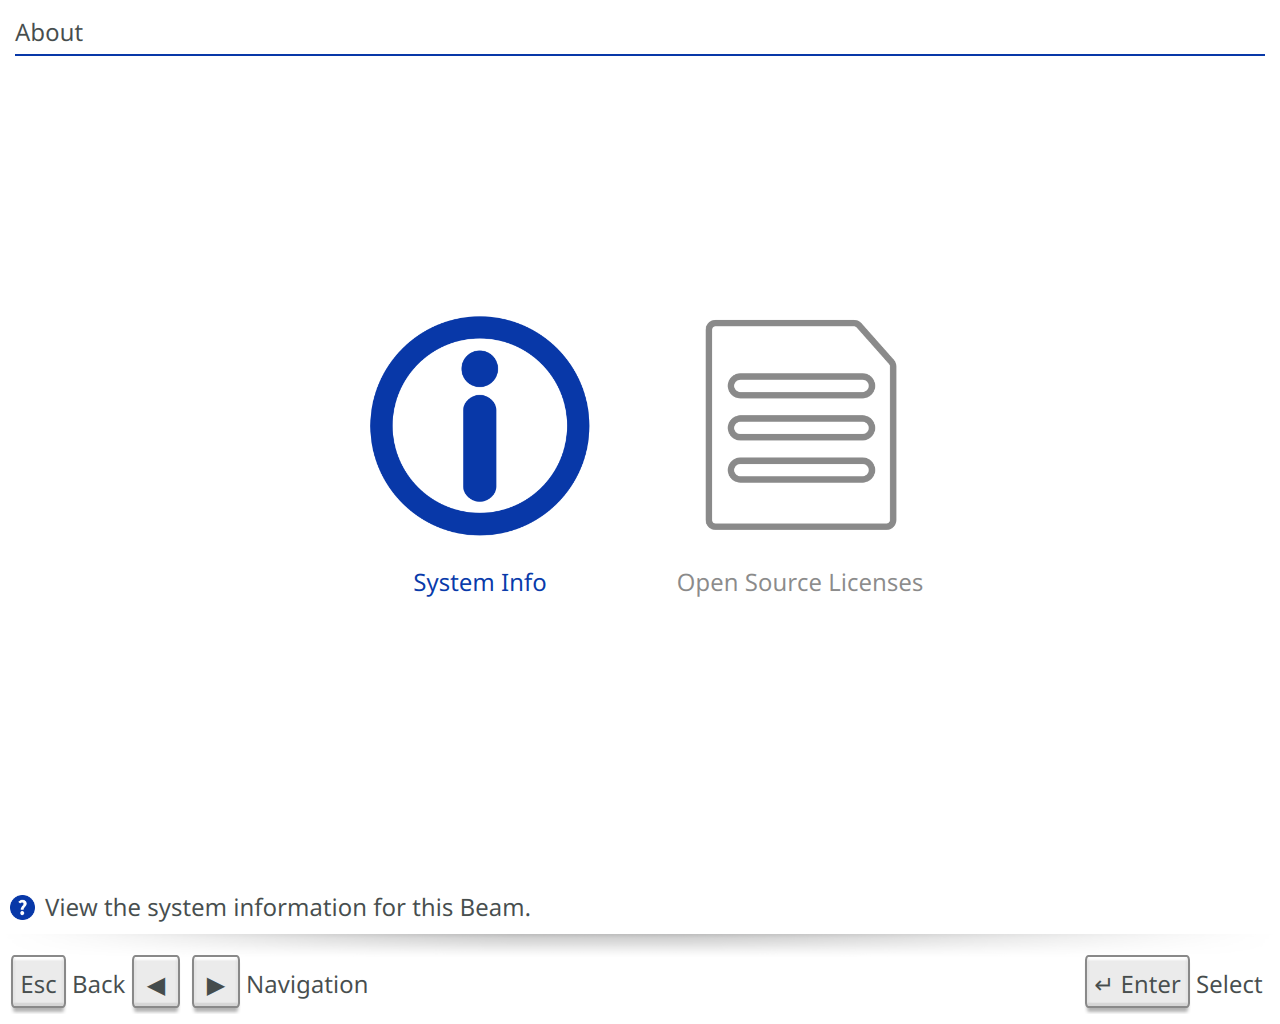
About
Displays information about your Beam.
-
System Info
Shows the system information for the Beam
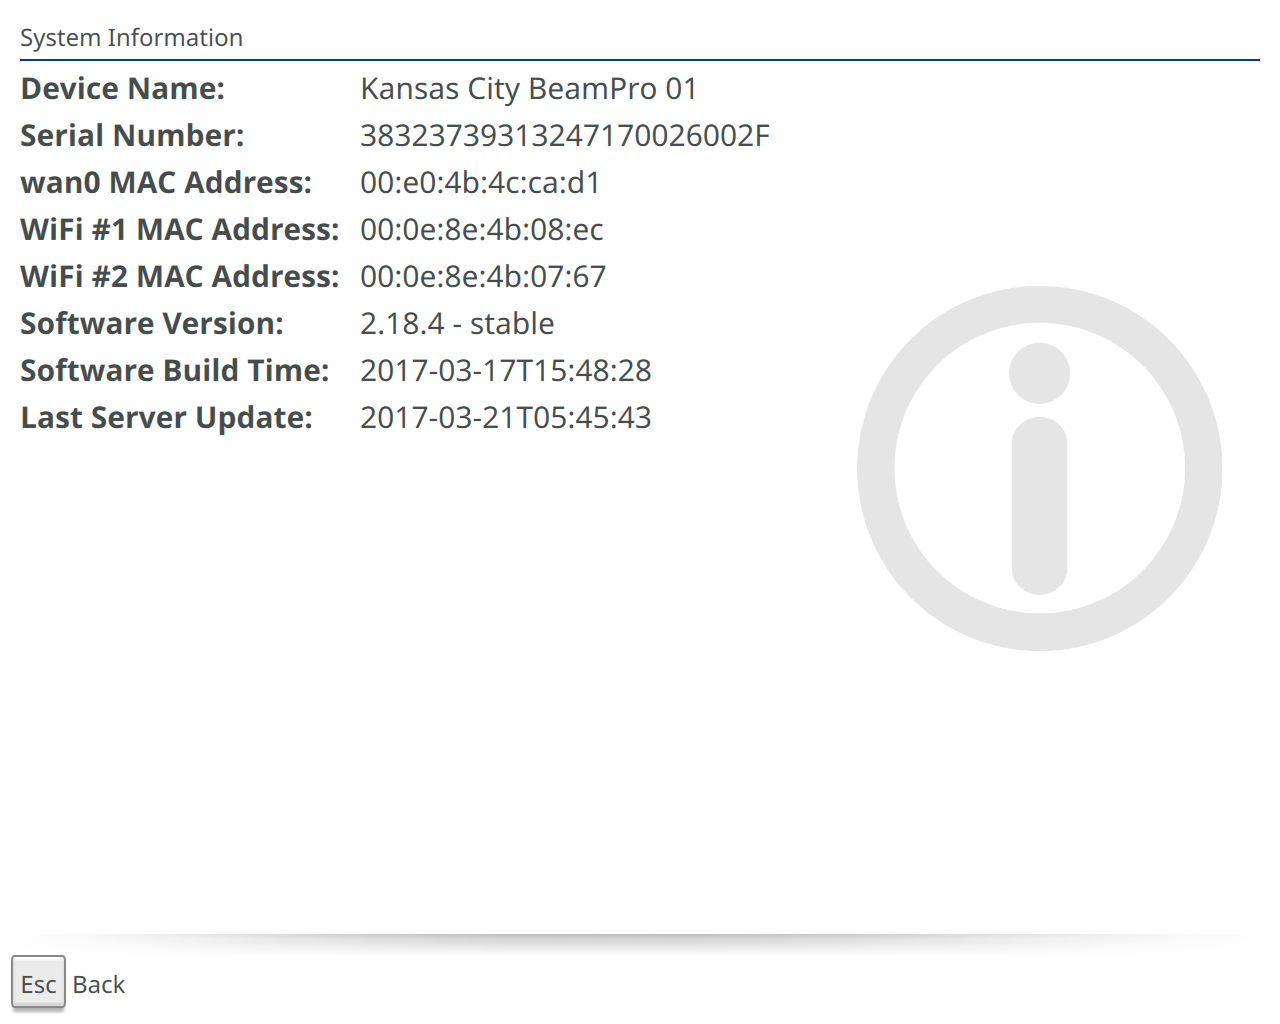
- Device Name: Name applied to the device.
- Serial Number: Serial number of the device.
- WiFi # 1 MAC address: MAC address of first WiFi adapter.
- WiFi # 2 MAC address: MAC address of second WiFi adapter.
- Software Version: Version of software running on the device.
- Software Build Time: Build date of software running on the device.
- Last Server Update: Last reported time the device talked to Suitable Technologies’ infrastructure.
-
Open Source Licenses
View the licenses associated with open source software in use.