Advanced Beam Manager Guide
Table of Contents
- Overview
- Logging In and Launching the Beam Manager
- Beam Manager Dashboard
- Inviting a New Beam User
- Granting Temporary Access
- Importing Beam Users From a CSV File
- Creating and Adding Users to a User Group
- Linking a Newly Acquired Beam
- Managing Your Beam
- Creating a New Device Group
- Adding Individual Beam Users to a Device Group
- Adding User Groups to a Device Group
- Access Times for a Device Group
- Reserve a Beam from Device Group
- Changing Device Group Settings
- Monitoring Beam Activity
- Beam Organization Settings
Overview
The Advanced Beam Manager is used to manage Beam users and devices, schedule access and check activity within your Beam Organization. To manage users and devices, you must be a Beam Administrator for your organization.
Logging In and Launching the Beam Manager
-
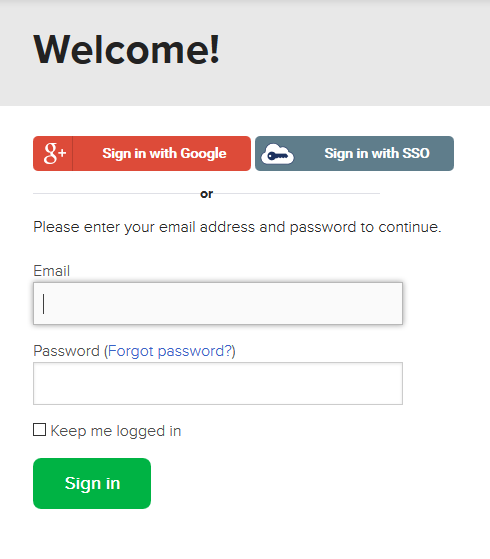
Browse to suitabletech.com and click “Login” in the top right corner.

-
Beam Authentication uses Suitable infrastructure to authenticate credentials.
-
Enter your email address and password in the fields provided
-
Select Sign In
-
Upon successful authentication, your Beam application will open to your Beam Lobby.
-
-
Sign in with Google is only available to users with Gmail or Google for Business.
-
Click Sign in with Google
-
A new window will open to view your Google Accounts
-
Select the associated account to sign in
-
Upon successful authentication, your Beam application will open to your Beam Lobby
-
-
Sign in with SSO is available to users who authenticate via SSO.
-
Click Sign in with SSO
-
A new browser window will open to the Suitable Technologies Welcome page
-
Upon successful authentication, your Beam application will open to your Beam Lobby
-
-
-
Enter your Beam ID and password or click the “Sign in with Google” or “Sign in with SSO” button if you authenticate via another provider.
-
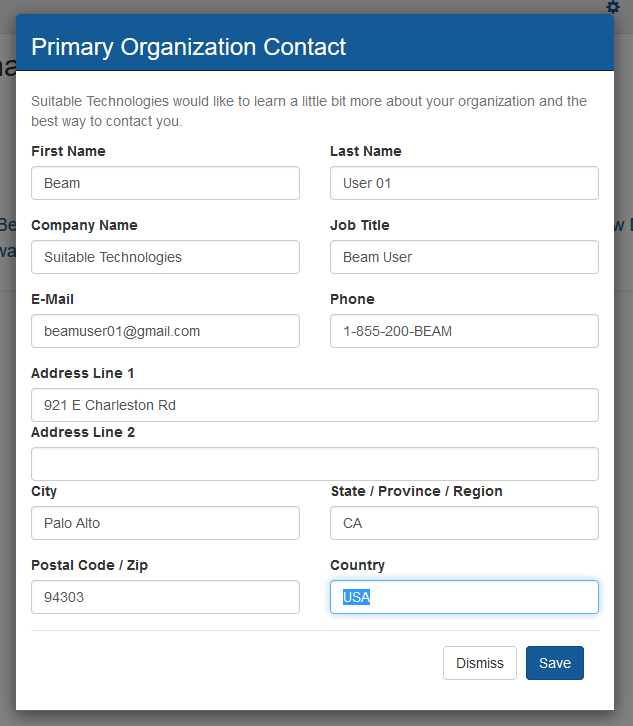
If this is the first time you’ve signed in, you will need to enter information about yourself and your Beam Organization
-
Once logged in, click the button with your name in the top right corner to open the user menu and click “Beam Manager” or click on the “Beam Manager” button on your account home page.

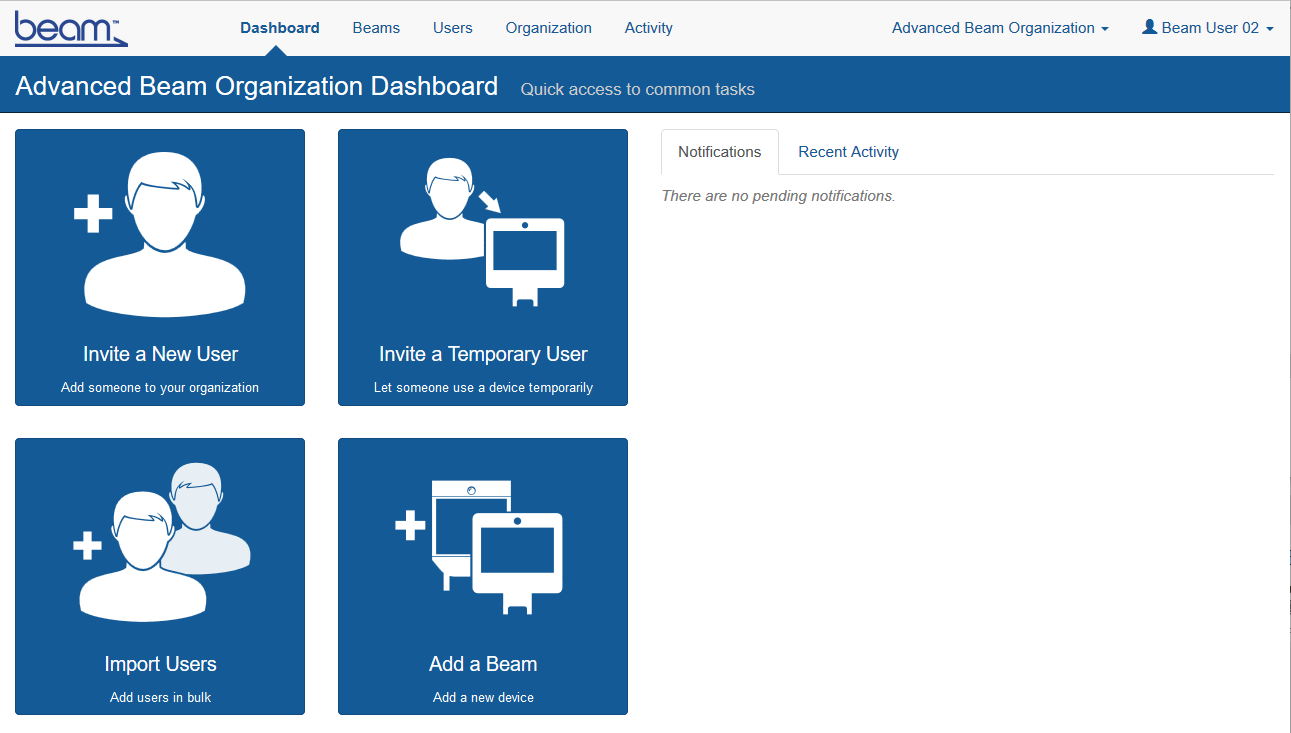
Beam Manager Dashboard
The starting point for managing your Beams and Beam Users.
Note: If you are an administrator for multiple organizations, you can choose the organization for which you want to make changes from a drop-down list in the upper-right corner of the aplication.
-
See the various tools available to Beam Administrators:
-
Dashboard - Buttons for common activities as well as a list of recent Beam activity within the organization.
-
Beams - Manage and configure Beams, Device Groups and set access and access times for these groups.
-
Users - Manage and configure Users and User Groups.
-
Activity - Monitor activity and run activity reports for Beam usage within an organization.
-
Organization - Change settings of your Beam organization.
-
Inviting a New Beam User
Invite someone to use your Beams.
See below for instructions to grant access to a new Beam User.
-
From the Beam Manager dashboard, locate and click the “Invite a New User” button.
-
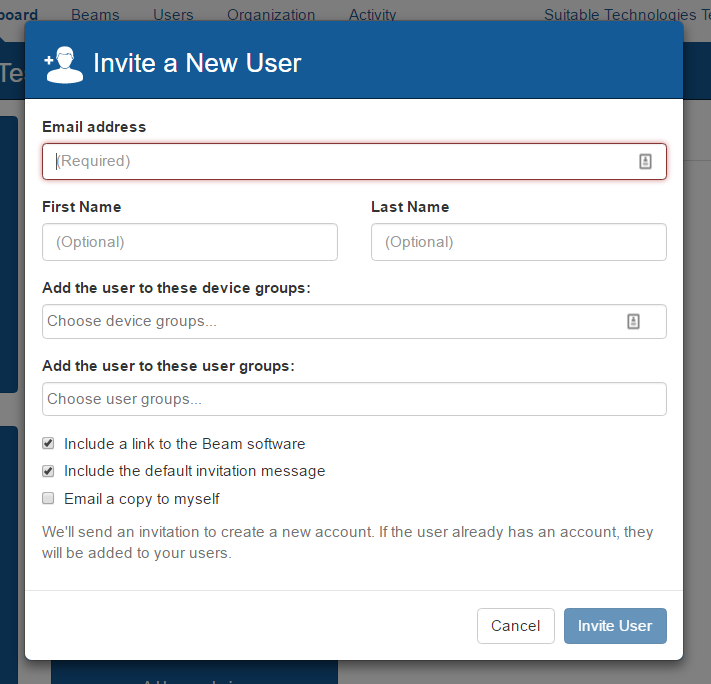
Complete the “Invite a New User” form:
-
Enter an email address (required, must be a valid email address).
-
Enter first name (optional).
-
Enter last name (optional).
-
Select any user groups to which you’d like to add the user. (Optional, multiple selections allowed).
-
Select any device groups to which you’d like to add the user. (Optional, multiple selections allowed).
-
Select the “Email a copy to myself” option if you would like a copy of the invite email for your records. Note: The password link in the copy of this message will be removed for security purposes.
-
Click “Invite User” button.
-
-
Invited users will be notified via email with the following information:
-
Who invited them.
-
Which device groups/devices they can access.
-
Their user name.
-
A link to create a password and get the Beam application.
-
-
After sending the invitation, the user will be added to your organization.
-
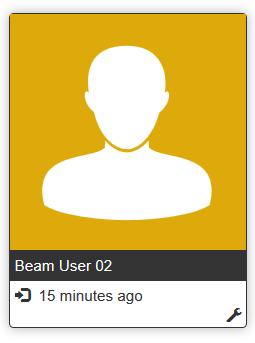
To change a Beam User’s profile image, locate the person whose profile image you want to edit, and click on their name.
-
Hover your cursor over the current profile image to view the “Change image…” link. Highlight and click to proceed.

-
Once clicked, a form appears, click on the “Choose file” button.

-
A file browser window appears showing your system’s directory. Locate any .jpg, .png or gif file that is less than 2MB in size.
-
Click on the open button (lower right hand corner).
-
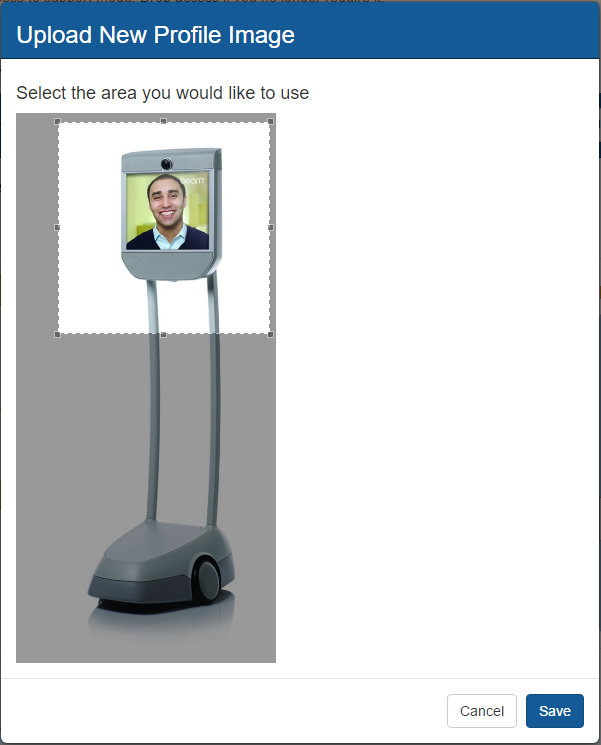
Your image will load into a cropping tool. Use the controls to select the area of the image you’d like to use.
-
Once you’re happy with the results, click on the “Save” button.
Granting Temporary Access
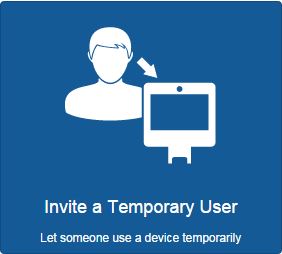
Invite someone to use your Beam(s) for a set period of time, temporarily.
-
From the Beam Manager dashboard, locate and click the “Invite a Temporary User” button.
-
Complete the “Invite a Temporary User” form:
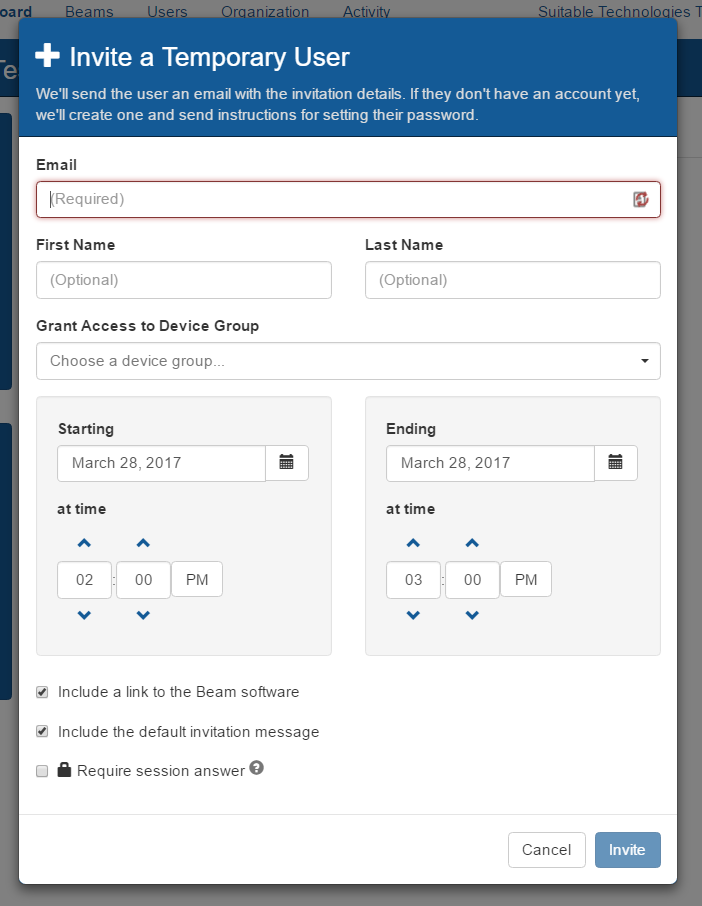
- Enter an email address (required, must be a valid email address)
- Enter first name (optional)
- Enter last name (optional)
- Choose a device group that the user will have access to (required)
- Enter a Starting Date (required)
- Input an Ending Date (required)
- Enter a Start Time (required)
- Enter an End Time (required)
- Choose whether the temporary user will “Require Session Answer”. Note: This option requires someone local to the Beam to acknowledge the session request before initiating the session, helping to avoid accidental eavesdropping.
-
Invited users will be notified via email with the following information:
- Who invited them.
- Which device groups/devices they can access.
- Access Times to each assigned device group.
- Their user name.
- A link to create a password and get the Beam application.
-
After sending the invitation, the system will create a temporary access time during which the user can call Beams in the specified device group.
Importing Beam Users From a CSV File
Invite a list of people to use your Beam(s).
-
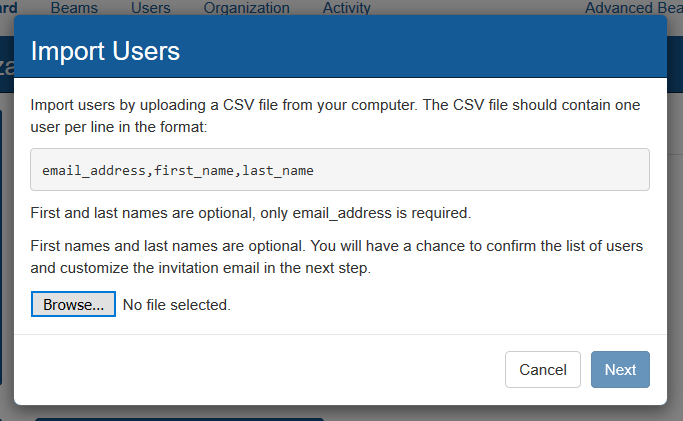
Create a CSV file with one user per line in the following format:
email_address,first_name,last_name -
From the Beam Manager dashboard, locate and click the “Import Users” button.
-
Click the “Choose File” button and browse to your CSV user file. Note: You will have a chance to confirm the list of users and customize the invitation email in the next step.
-
Complete the “Import Users” form.
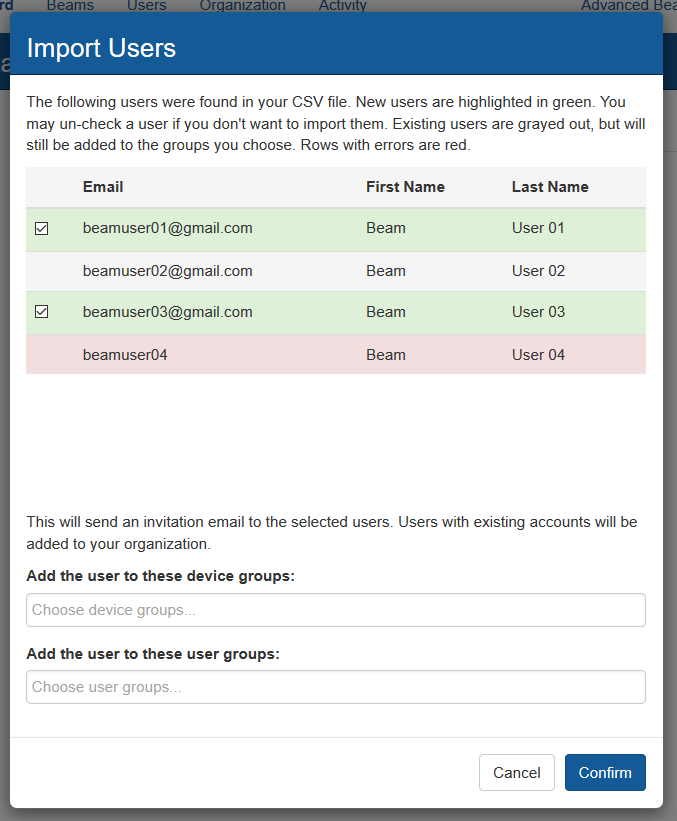
- New users are highlighted in green.
- You may uncheck a user if you do not want to import them.
- Existing users are highlighted in gray and will not be imported.
- Users with errors are highlighted in red.
- Select any user groups to which you’d like to add the users (optional, multiple selections allowed).
- Select any device groups to which you’d like to add the users (optional, multiple selections allowed).
-
Click the “Confirm” button.
-
Imported Users will be notified via email of the following:
- Who invited them.
- Which device groups/devices they can access.
- Their user name.
- A link to create a password and get the Beam application.
-
After sending the invitations, each new user will be added to your organization.
Creating and Adding Users to a User Group
Placing users in different groups allows the administrator to regulate access to a Beam or groups of Beams.
See below for the steps to create and add users to a new Beam User Group.
-
From the Beam Manager dashboard, locate and click the “Users” tab then click on the “Create New User Group” button at the upper right.

-
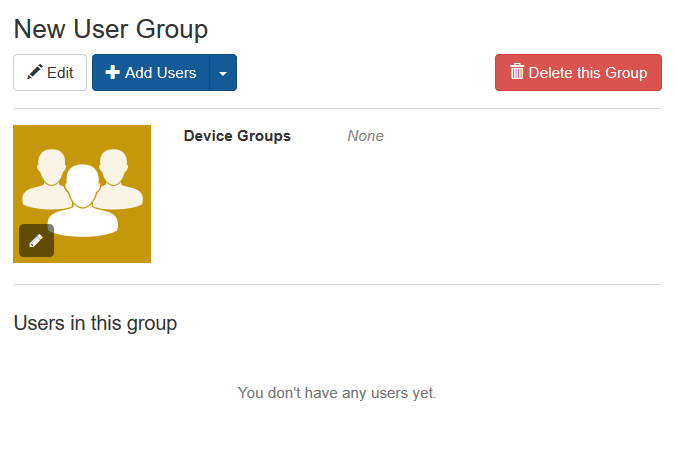
Enter the user group’s name and select “Create User Group”.
-
Click the “Add Users” button in the upper left area, below the user group’s name.

-
Complete the “Choose Users” form.
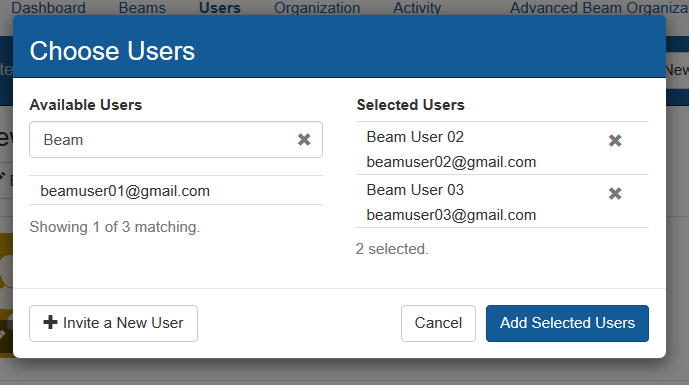
-
Select users to add (required)
-
Click the “Add Selected Users” button when all users have been selected.
-
The new group will appear with other user groups at the top of the Users page.
-
To change a User Group’s profile image, click on the user group you’d like to edit.
-
Hover your cursor over the current profile image to view the “Change image…” link. Highlight and click to proceed.
-
Click “Choose file…” and find the image you’d like to use.
-
Click “Open”.
-
Crop the image to your liking, then click “Save”.
Linking a Newly Acquired Beam
See below for the steps to link a newly acquired Beam to your organization.
-
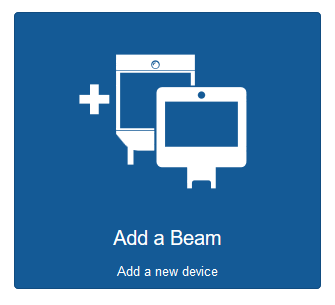
From the Beam Manager dashboard, locate and click the “Add a Beam” Button.
-
Complete the “Link a Beam with your account” form.
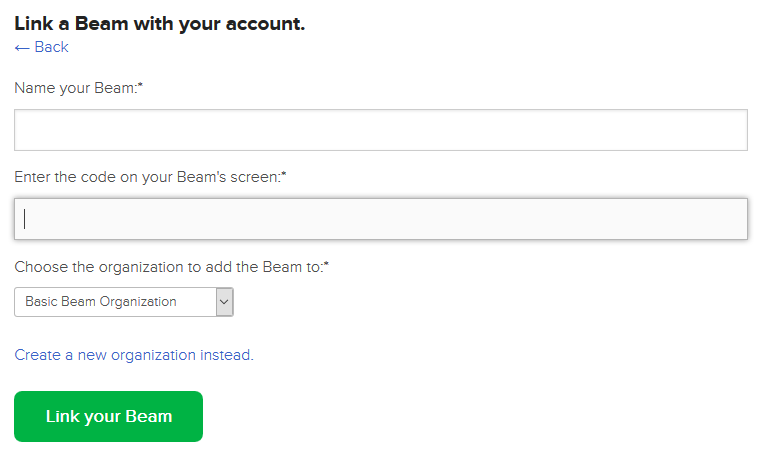
- Choose a name for the new Beam
- Enter the linking code on the Beam’s screen. Note: If your Beam does not have a linking code, it may be linked to another organization or may have a connection issue.
- Ensure the Beam organization to which you are linking the new Beam is correct
- Click the “Link your Beam” button.
Managing Your Beam
See below for the steps to configure your Beam.
-
From the Beam Manager dashboard, locate and click the “Beams” tab, then select the Beam you’d like to manage from the Devices list.
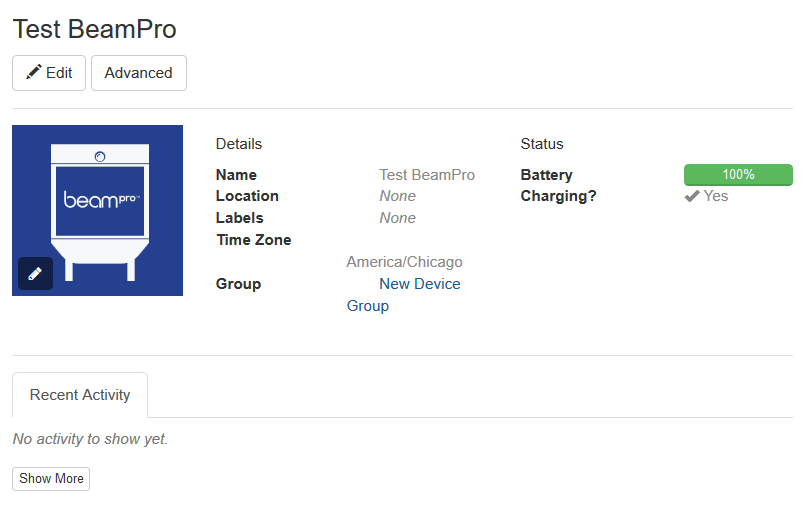
-
Click the “Edit” button.
-
Complete the “Edit Device” form.
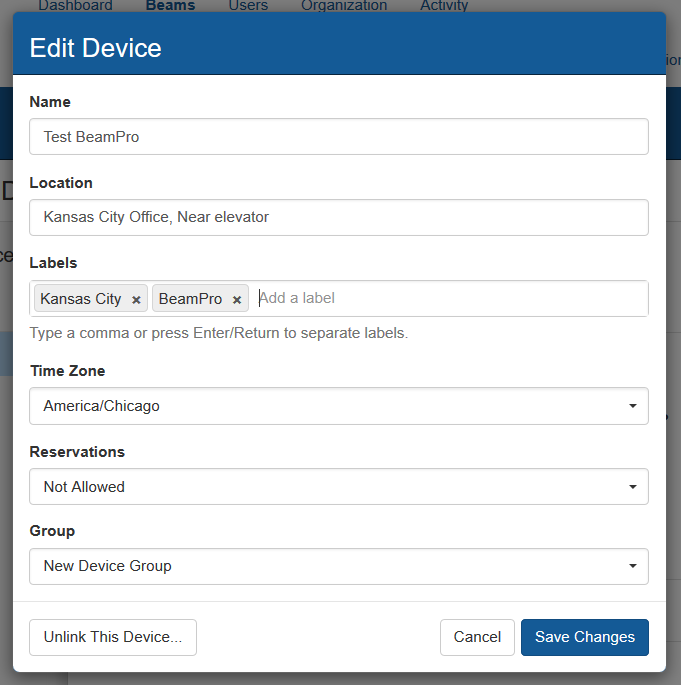
- Choose a name for the Beam. (required)
- Set the location of the Beam. (optional)
- List any labels for the Beam, i.e. “3rd Floor Conference Room” or “For Jim to Use”.
- Select the Time Zone where the Beam is located (required).
- Select whether you would like the Beam to be reservable or not. (required).
- Select the desired device group of the Beam (required).
-
Click the “Save Changes” button.
-
To change a Beam’s profile image, click the icon for the Beam you’d like to change.
-
Hover your cursor over the current profile image to view the “Change image…” link. Highlight and click to proceed.
-
Click “Choose file…” and find the image you’d like to use (.jpg, .gif or.png format).
-
Click “Open”.
-
Crop the image to your liking, then click “Save”.
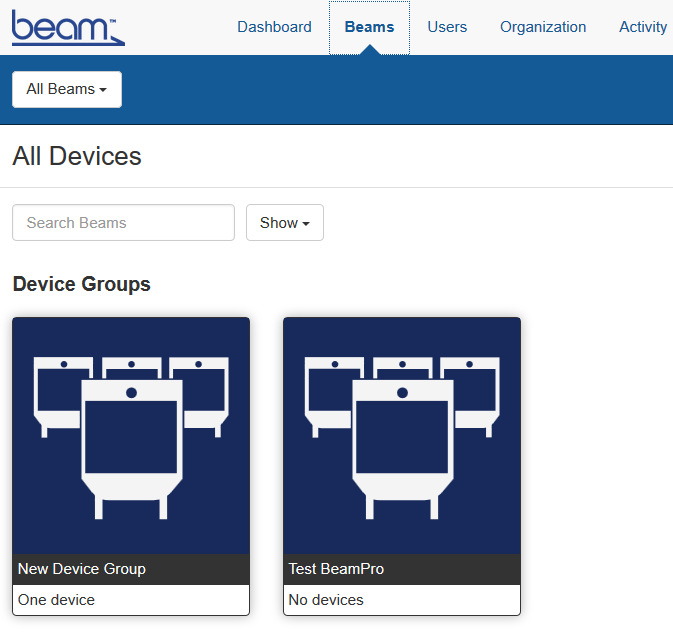
Creating a New Device Group
Placing Beams in different groups allows the administrator to regulate access to a Beam or groups of Beams in different departments or locations.
See below for the steps to create and add Beams to a new device group.
-
From the Beam Manager dashboard, locate and click the “Beams” tab then click on the “Create Device Group” button.
-
Complete the “Create Device Group” form.
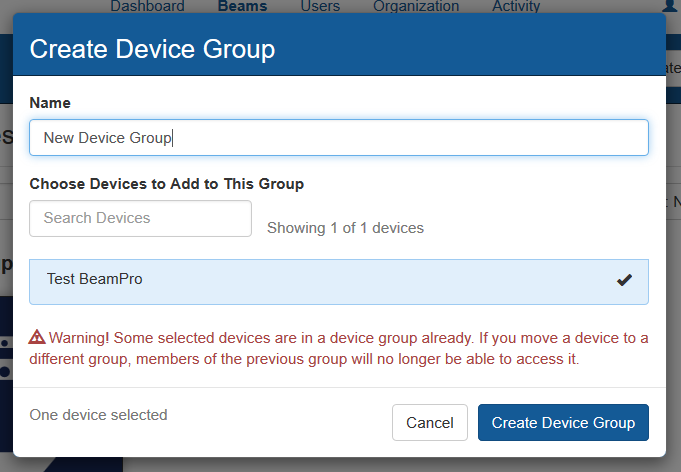
- Choose a name for the new device group (required)
- Select Beams to add to new device group. (optional) Note: If a Beam already belongs to another Device Group, it will be removed from its old group.
-
Click the “Create Device Group” button.
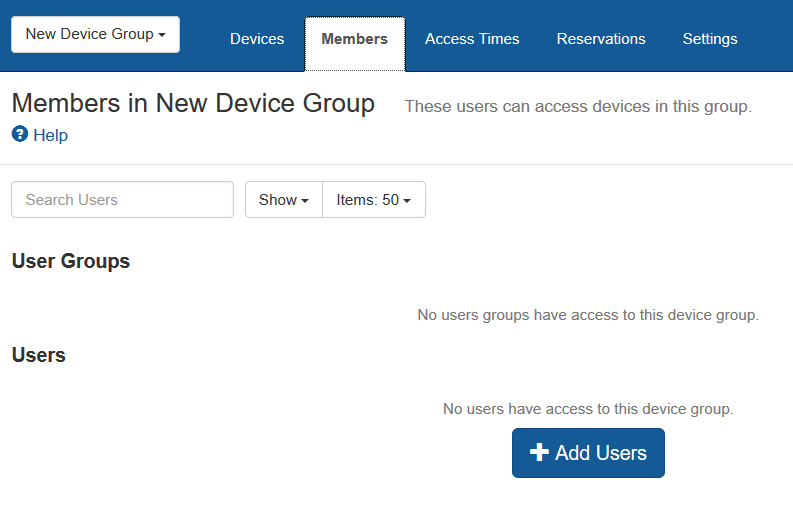
Adding Individual Beam Users to a Device Group
Every one of your Beams lives in a device group. Device groups let you choose access times, manage permissions, and apply settings to one or more Beams at a time.
To allow users to access Beams in a device group, you must add them to the group. You can add users individually or you can add entire user groups.
See below for steps to add individual Beam Users to a device group:
-
From the Beam Manager dashboard, locate and click the “Beams” tab then click on the icon for the device group you’d like to change.
-
Select the “Members” tab.
-
Click on the “Add Users” button located in the top right hand corner of the screen.

-
Choose the users you would like to add and click the “Add Selected Users” button.
Adding User Groups to a Device Group
To add user groups to a device group, follow the instructions above for adding individual members, but select one or more user groups in the “Choose Users” dialog. You can add both individual users and user groups at the same time.
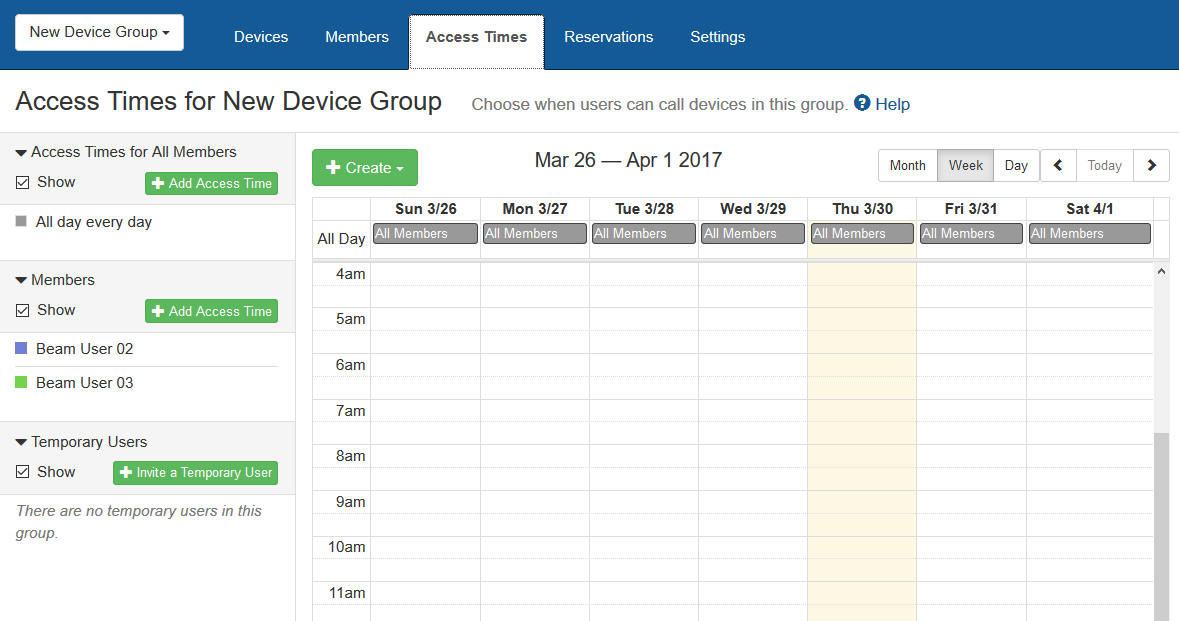
Access Times for a Device Group
By default, device group members will have access to the Beams in the group 24 hours a day, seven days a week. If you’d like to change this, you can create more granular access times that restrict access during certain hours of the day.
For each access time, the Session Answer feature can be turned on or off. When Session Answer is enabled, someone local to the Beam or a Beam Administrator must accept the session request before the session is initiated. This feature is similar to picking up a phone before talking and will avoid accidental eavesdropping.
-
From the Beam Manager dashboard, locate and click the “Beams” tab then click on the icon for the device group you’d like to change.
-
Click “Access Times” tab.
-
Access Time for All Members
You can create access times that will be shared by all members in the group (unless you specifically disable this behavior for specific members). By default, there is already a single access time for “All Members: All day, every day.” You can remove this access time and create more restrictive access times. If this entry exists, it will trump all other access times.
-
Click “Add Access Time” button below “Access Times for All Members”
- Select each day that group members have access to this device group.
- Select time of day when all group members have access. You can pick either “All day” or a specific time range.
- If you’d like to require users’ sessions to be answered by a local or an administrator during this time, select “Require Session Answer”.
- You can add as many access times for all members as you like.
-
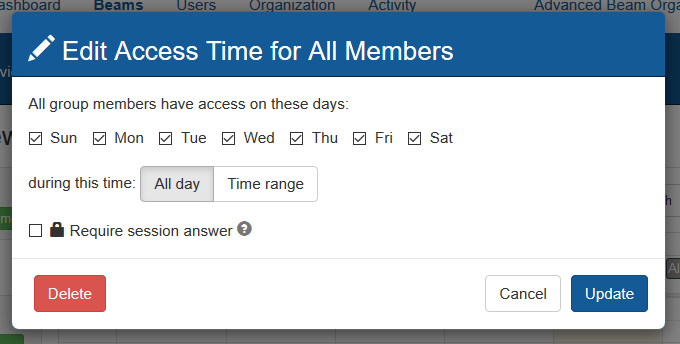
Editing Access Times for All members
-
Click on the the access time description you wish to edit under “Access Times for All Members”.
-
Select each day that group members have access to this device group.
-
Select time of day all group members have access: Either “All day” or choose a time range.
-
If you’d like to require users’ sessions to be answered by a local or an administrator during this time, select “Require Session Answer”.
-
-
-
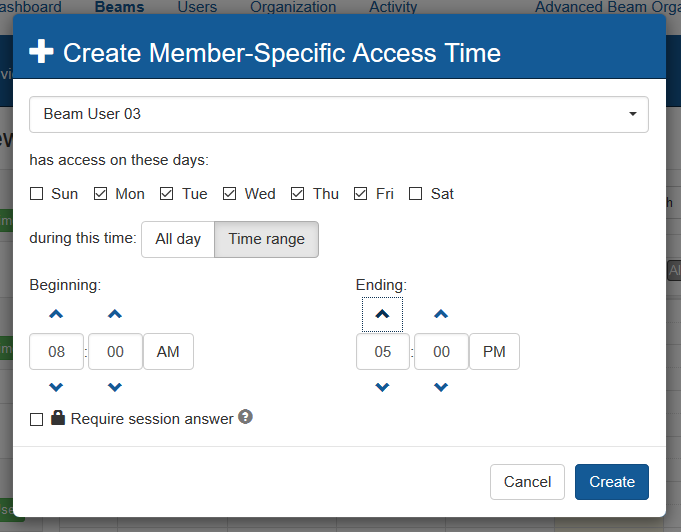
Access Times for Users or User Groups
You can set access times specific to a Beam User, Beam User Group or Temporary Beam User.
-
Click on “Add Access Time” under the “Members” heading or by clicking on a member of the device group.
-
Select the user or user group to which you’d like to apply this access time.
-
Select each day that the member should have access.
-
Select the time of day when the member should have access: Either “All day” or choose a time range.
-
If you’d like to require users’ sessions to be answered by a local or a Beam Administrator during this time, select “Require Session Answer”.
-
You can add as many access times for members as you like.
-
-
Adding or Editing Temporary Access Times
For instructions to invite a Temporary Beam User, see the heading titled “Granting Temporary Access.”
-
You can edit existing temporary access times by clicking on them in the calendar or in the menu in the left column.
-
Select the user to which you’d like to apply this temporary access time.
-
Select the date and time when access should begin.
-
Select the date and time when access should end.
-
If you’d like to require the temporary user’s session to be answered by a local or an administrator during this time, select “Require Session Answer”.
-
You can create multiple temporary access times for a user, if needed.
-
Reserve a Beam from Device Group
See below for the steps to reserve a Beam for a specific user for a specific time.
-
From the Beam Manager dashboard, locate and click the “Beams” tab, then select the Beam you’d like to reserve from the Device list. Note: The Beam you would like to reserve must have reservations “Allowed” to perform the following steps. See the “Managing Your Beam” setcion above for more information.

-
Click on the “Reserve a Beam” button.
-
Fill out the required information for the reservation
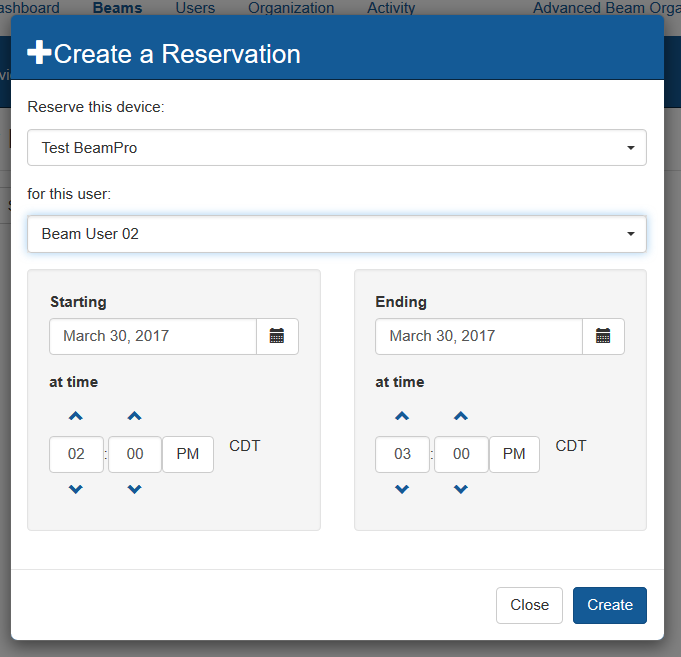
-
Select the Beam to be reserved. Note: this Beam will be “Unavailable” to all other users during the reservation time.
-
Select the user who would like to reserve the Beam.
-
Choose a time when the reservation will start and the reservation will end.
-
Changing Device Group Settings
See below for the steps to change the settings for a device group.
-
From the Beam Manager dashboard, locate and click the “Beams” tab then click on the icon for the device group whose settings you’d like to change.
-
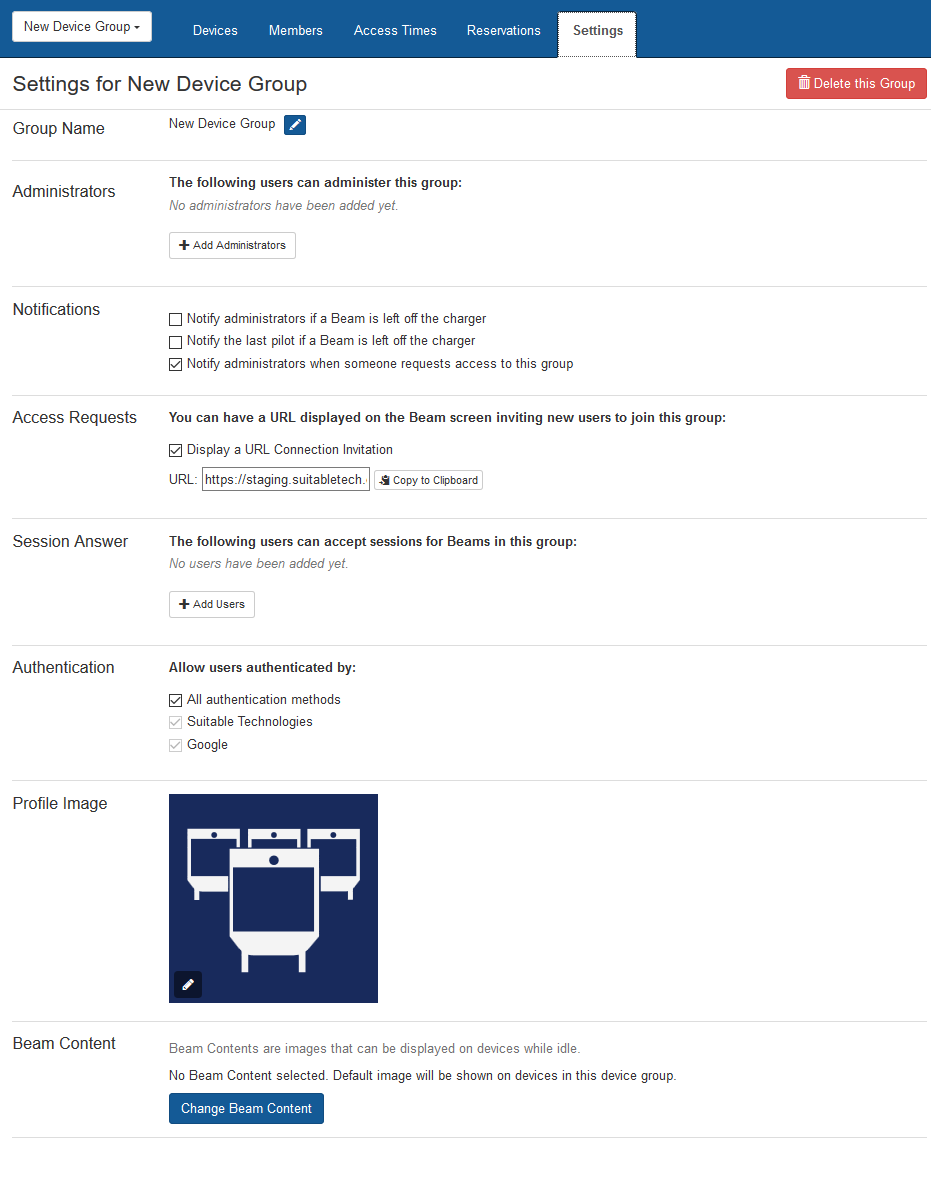
Click the “Settings” tab.
-
Group Name
- Edit the name of the device group.
- Edit the name of the device group.
-
Device Group Administrators
- You can choose users to administer this device group. They won’t be able to change your organization’s settings or the settings of other device groups, but they will be able to invite and accept new users, change device group settings, and change settings for devices within this device group.
- You can choose users to administer this device group. They won’t be able to change your organization’s settings or the settings of other device groups, but they will be able to invite and accept new users, change device group settings, and change settings for devices within this device group.
-
Setting Device Group Notifications
-
Under “Notifications”, click the “Add User” button to choose which users will be notified if a Beam is left off the charger (optional)
-
Select “Also notify last pilot if a Beam is left off charger” if you’d like the last pilot to be notified as well (optional)
-
-
Setting Access Request URL
- Choose whether a URL and QR code are displayed on the Beam screen when not in use so users can request access.
- Choose whether a URL and QR code are displayed on the Beam screen when not in use so users can request access.
-
Setting Who Can Answer Incoming Sessions
- Under “Session Answer”, click the “Add Users” button to choose which users can accept session requests for Beams in this group. Note: Users with Session Answer privileges must be logged into the Beam Application to answer Beam sessions. Locals can always answer incoming sessions by tapping on the Beam when it is ringing.
- Under “Session Answer”, click the “Add Users” button to choose which users can accept session requests for Beams in this group. Note: Users with Session Answer privileges must be logged into the Beam Application to answer Beam sessions. Locals can always answer incoming sessions by tapping on the Beam when it is ringing.
-
Setting Device Group Authentication
-
Choose which authentication methods are required for accessing this device group.
- All authentication methods - Allows for Suitable Technologies (username and password), Google authentication, or any future authentication methods that are added.
- Suitable Technologies - Allows only Suitable Technologies authentication (username and password) for this device group.
- Google - Allows only “Sign in with Google” authentication for this device group.
-
-
Change the Device Group Profile Image
-
Select Content to be Displayed on Beam Screen When Not In Use
- Put a logo or picture on the Beam screen when the device is docked and not in use. Note: Image should be a high quality PNG, JPG or BMP file and should be in 4:3 aspect ration for BeamPro and 16:9 for Beam, otherwise image may appear distorted.
Monitoring Beam Activity
See below for the steps to monitor Beam activity for an organization.
-
From the Beam Manager dashboard, locate and click the “Activity” tab.
-
Specify the date range and state of activity to monitor (In a call, Missed Calls, Offline, Configuring, or Upgrading)

Each device with activity during the specified range will be listed.
-
Click on an event in the timeline to view its details.
-
Left click and drag to navigate along the timeline.
-
Zoom in or out of the timeline using your mouse wheel or by scrolling on your trackpad.
-
To do more in depth analysis of Beam usage, you can download a CSV file of the activity by clicking the “Export CSV” button.
Beam Organization Settings
See below for how to change settings specific to your Beam Organization
-
Settings
If you’d like to change the details of your Beam Organization or change how users authenticate to your organization, check here.

-
Organization Name - Change the name of your Beam Organization.
-
Email Notifications - Change the name notification emails are sent from.
-
Default Invite Message - Change the default invite message new Beam Users receive.
-
Authenticate Users Via - Change the authentication method for your Beam Organization. For instructions on setting up SSO, check out the Beam Help Center
-
-
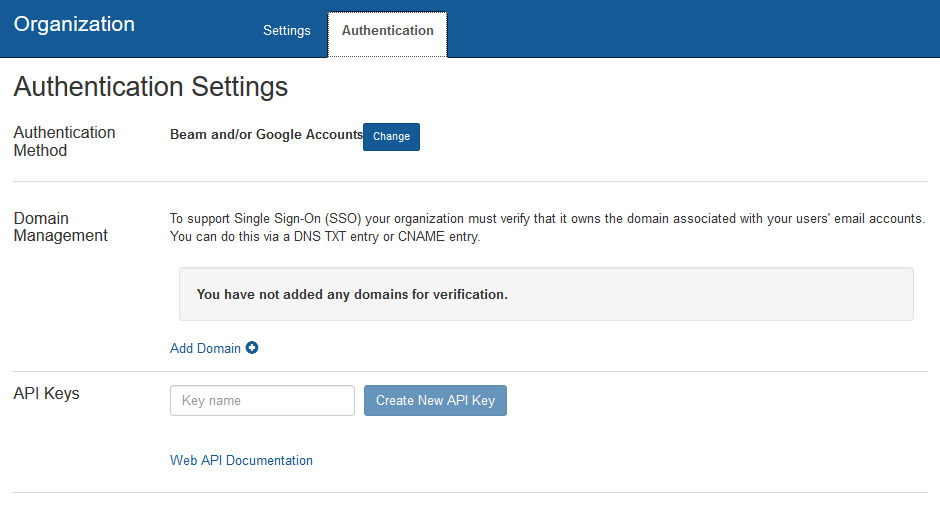
Authentication
If you’d like to change the way your users authenticate, check here.
-
Authentication Method - Change the authentication method for your Beam Organization. For instructions on setting up SSO, check out the Beam Help Center
-
Domain Management - To support Single Sign-On (SSO) your organization must verify that it owns the domain associated with your users’ email accounts. You can do this via a DNS TXT entry or CNAME entry.
-
API Keys - If you’d like to automate certain aspects of managing Beams in your organization, you can use the Beam Administration API. Check out the Beam Administration API documentation. To access the API, you’ll need to create an API key for your organization.
-
-
Billing
If you’d like to see billing information for your Beam Organization, see here.
-
Device Support
If you’d like to see device support plans and expiration dates, see here.